How to Track Changes in Word 2013
If you have ever needed to collaborate with other person(s) to prepare a document, or if anyone has ever asked you to proofread their work, it is extremely helpful to make use of the Track Changes feature in Word 2013. Unfortunately, most people don’t know how to track changes on Word 2013. Once you have learned how to track changes in Word 2013, you can share edited files with unprecedented ease. Read through the step-by-step guide below to learn how to track changes in Word 2013.
Step 1: Launch Word 2013
Step 2: Open the document in which you wish to insert changes
Step 3: Click on the Review tab
![]()
Step 4: Click on the Track Changes button

Step 5: Start making changes to the document

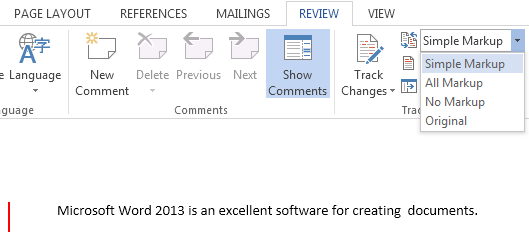
Step 6: You can change the way changes are visible by changing settings in the Markup section under the Review tab. Simple Markup shows the edited version, with a small red bar which you can click to view the changes. All Markup shows the original version with each change. No Markup shows the final version. Original shows the unedited version.
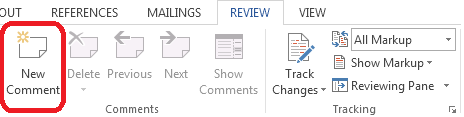
Step 7: If you want to add comments about why you made the changes, you can click on the New Comments option under the Review tab
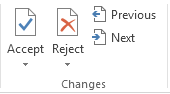
Step 8: If someone sends you a document with track changes, you can Accept or Reject each change individually by using the options in the Changes section under the Review tab. Use the Previous and Next buttons to look through all the changes in order.