
This tutorial is for the WordPress users who know a little about html and CSS codes. You can customize a basic WordPress theme from the editor option. It is very easy to customize some basic options from editor.
From editor you can add, edit, delete all the html, php and CSS codes of the template.
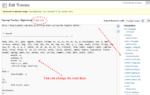
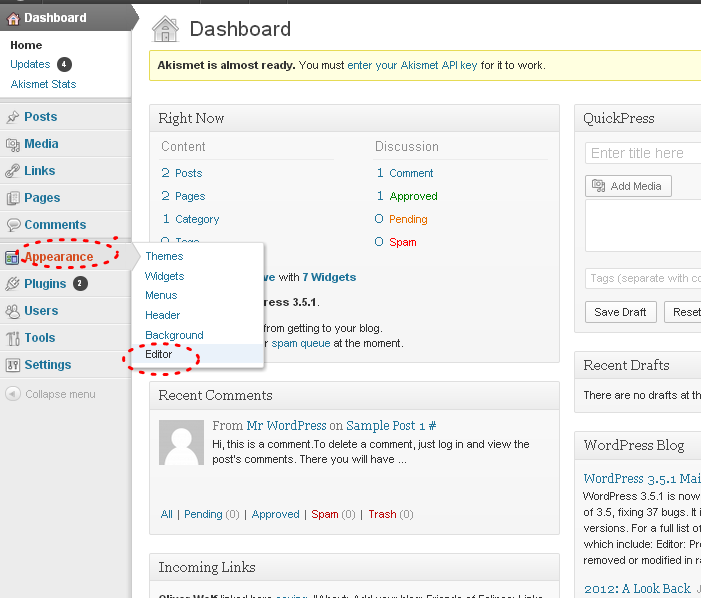
01. To edit/add/delete the codes go to Appearance -> Editor.
02. On the right of the editor there are several html, php and css files such as archive.php, author.php, category.php, style.css, index.php etc. They can be categorized as Templates and Style. If you don’t know ABC of html, php or CSS then don’t try to change anything to the .php files. But you can still change some basic structure of the website like font color, body text color, heading etc from style.css page. Note that the code may vary depending on the templates. Click on style.css.
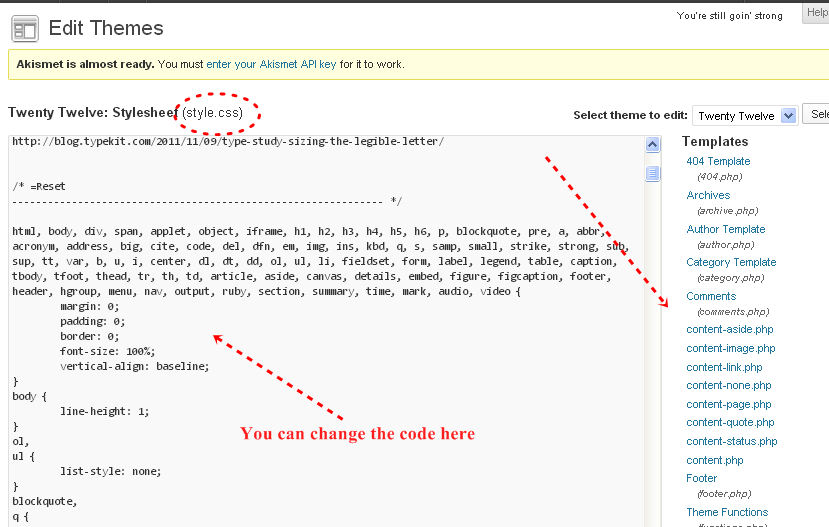
03. To change body text, font size, color, header, etc go to style.css and find the body tag (check the last screenshot).I am changing the font size (font-size:12px;) to 12 pixel and changing the color (color: #5681d6;) too. You can use online color picker ( eg – http://www.colorpicker.com/) to pick your own color code.
body {
font-size: 12px;
font-size: 1rem;
font-family: Helvetica, Times New Roman, sans-serif;
text-rendering: optimizeLegibility;
color: #5681d6;
}
04. To style the un-visited, visited, hover, and active links you can change the following code –
a:link {color:PickAnyColor;}
a:visited {color:PickAnyColor;}
a:hover {color:PickAnyColor;}
a:active {color:PickAnyColor;}
05. To change the header settings change the header tags. Here selecting h1 will give a larger heading. So if you want to make the heading font smaller then you can pick h2, h3, h4, h5 or h6 instead of h1.
/* Header */
.site-header {
padding: 24px 0;
padding: 1.714285714rem 0;
}
.site-header h1,
.site-header h2 {
text-align: center;
}
.site-header h1 a,
.site-header h2 a {
color: #515151;
display: inline-block;
text-decoration: none;
}
.site-header h1 a:hover,
.site-header h2 a:hover {
color: #21759b;
}
.site-header h1 {
font-size: 24px;
font-size: 1.714285714rem;
line-height: 1.285714286;
margin-bottom: 14px;
margin-bottom: 1rem;
}
.site-header h2 {
font-weight: normal;
font-size: 13px;
font-size: 0.928571429rem;
line-height: 1.846153846;
color: #757575;
}
.header-image {
margin-top: 24px;
margin-top: 1.714285714rem;
}
06. To style the sidebar like reducing or increasing the width, sidebar font color, font size etc then you can change it from editor. Check the following code.
/* Sidebar */
.widget-area .widget {
-webkit-hyphens: auto;
-moz-hyphens: auto;
hyphens: auto;
margin-bottom: 48px;
margin-bottom: 3.428571429rem;
word-wrap: break-word;
}
.widget-area .widget h3 {
margin-bottom: 24px;
margin-bottom: 1.714285714rem;
}
.widget-area .widget p,
.widget-area .widget li,
.widget-area .widget .textwidget {
font-size: 13px;
font-size: 0.928571429rem;
line-height: 1.846153846;
}
.widget-area .widget p {
margin-bottom: 24px;
margin-bottom: 1.714285714rem;
}
.widget-area .textwidget ul {
list-style: disc outside;
margin: 0 0 24px;
margin: 0 0 1.714285714rem;
}
.widget-area .textwidget li {
margin-left: 36px;
margin-left: 2.571428571rem;
}
.widget-area .widget a {
color: #757575;
}
.widget-area .widget a:hover {
color: #21759b;
}
.widget-area #s {
width: 53.66666666666%; /* define a width to avoid dropping a wider submit button */
}