How to create and lock Text Box in Word 2013. A Text box can be used as a decorative element in your document to highlight some important text or a paragraph. The primary purpose of adding a Text Box in the document is to prevent your document from looking like a Great Wall of Text. Let’s take a look at detailed steps to create and lock text box in Word 2013 document.
1. Launch Word 2013
2. Open Word document in which you want to add Text Box
3. Click on Insert
4. Click on Text Box
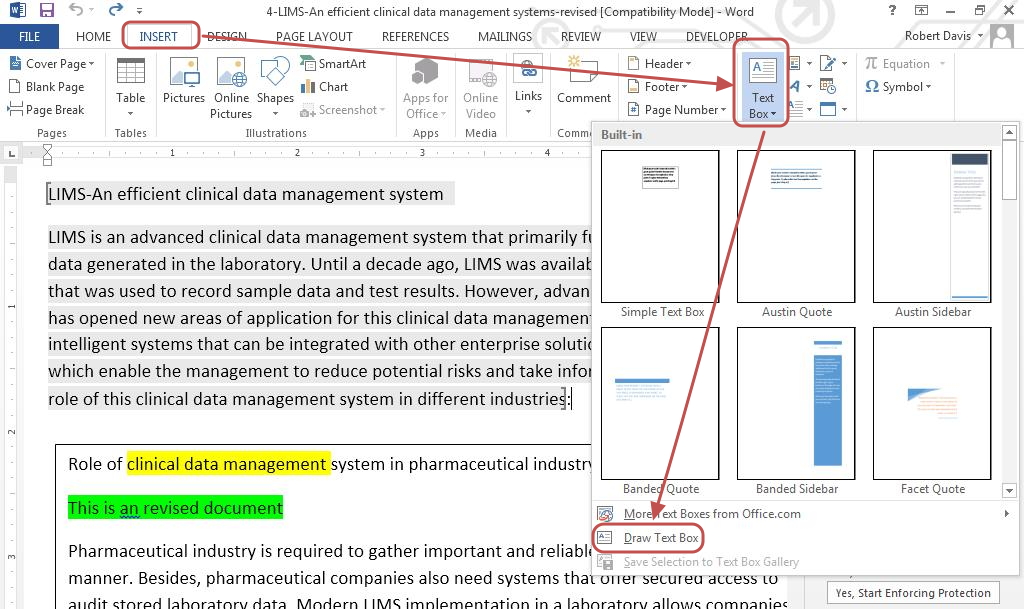
5. Select the type of Text Box you want to add.
There are several options such as Simple Text Box, Austin Quote, Austin Sidebar and many more. If you are not satisfied with the available type of text boxes, you can download more type of text box from Microsoft Online library or Draw a Text Box
Note: For demonstration purpose we will draw a Text Box.
6. Click on Draw a Text Box
A “+” cursor appears on the screen, drag the cursor to draw a Text Box of the desired dimensions
7. Once you have drawn the Text Box, click inside the Text box to add Text
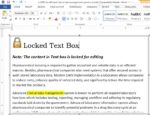
The advantage of using a Text Box is you can put in important information inside it and lock the Text Box to prevent its editing.
Steps to lock Text Box:
1. Locate Developer tab on the Ribbon. (Note: If you do not see Developer tab on the Ribbon, you need to activate it.
Steps to activate Developer option
a. Click on File to go to Backstage View
b. Click on Options
An Options dialog box opens.
c. Click on Customize Ribbon
d. Locate Developer option in right hand column of the Options dialog box
e. Check the box besides Developer option
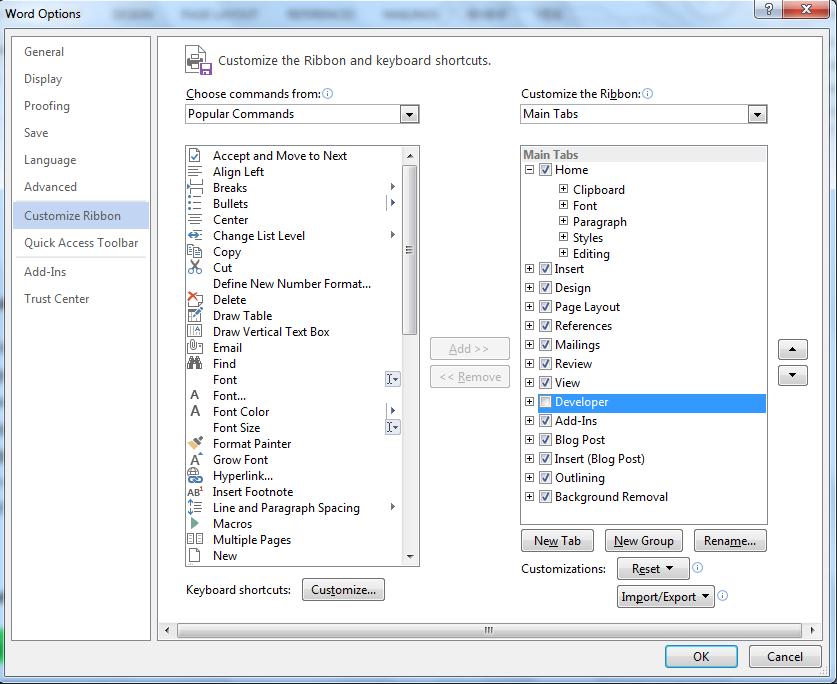
f. Click on OK to confirm your action and close the Options dialog box
Steps to lock Text Box contd……..
2. Click on Developer tab
3. Click on Restrict Editing
A Restrict Editing Side bar opens
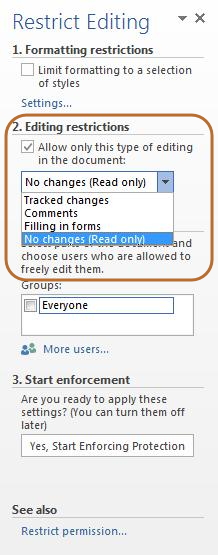
4. Under Editing Restrictions, select No Changes (Read only) from drop down list
5. Checkmark the option Allow only this type of editing in the document
6. Select the text in the document which can be edited. Do not select the Text Box as you want to restrict editing of content inside it

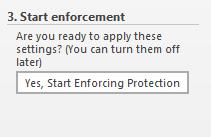
7. Under Start Enforcement, click on Yes, Start Enforcing Protection
Word prompts you to enter password for enforcing protection
8. Enter password and confirm it
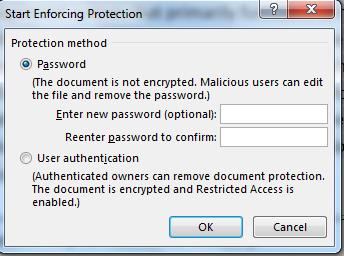
9. Click on OK
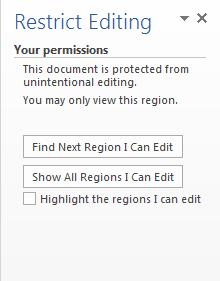
The document is now protected and you can only edit selected areas of the document
10. To see the part you can edit, click on Find Next Region I can Edit or Show all regions I can edit.
11. Checkmark the option Highlight the regions I can edit to see all regions that can be edited in the document.