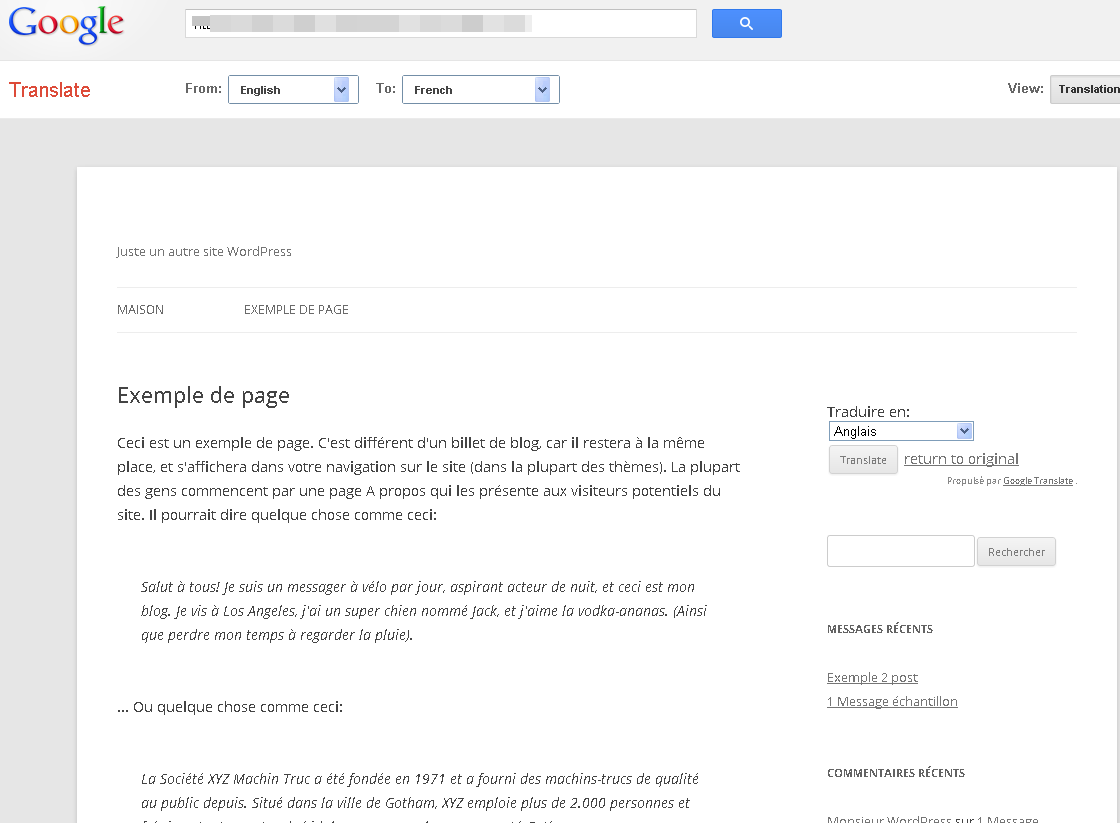
How many of us know Mandarin or German or French or even Arabic? Adding a language translator can make your website more popular. For a business website a language translator is very effective because a large number of website visitors from Asia and Europe who are non English speaker. Also it is tough to create 2-3 language version of any webpage. Google translator is a great plug-in that can be used in any websites, especially it is very easy to install on WordPress. In this simple tutorial I will show how to add Google translator in your website.
[Note that there are a number Google Translator plug-ins available online. You can use any of them. In this tutorial I am using Google Translator Version 0.04. Also I am using a sample website with a basic WordPress theme. ]
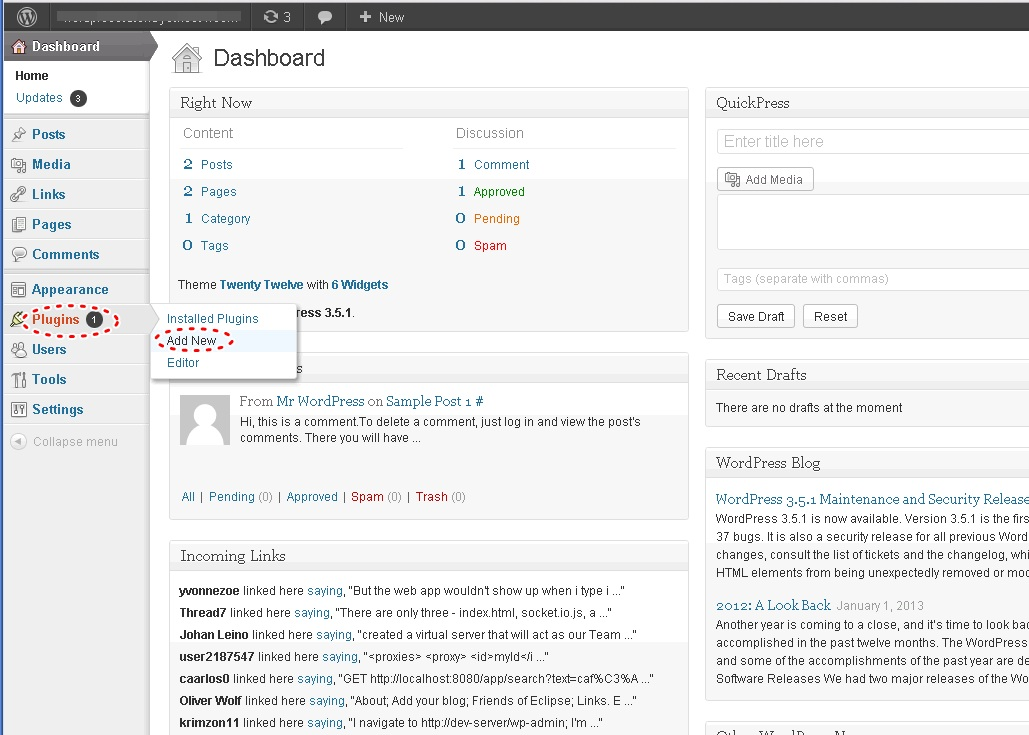
01. First log in to WordPress dashboard. Then go to plugins and then click Add New
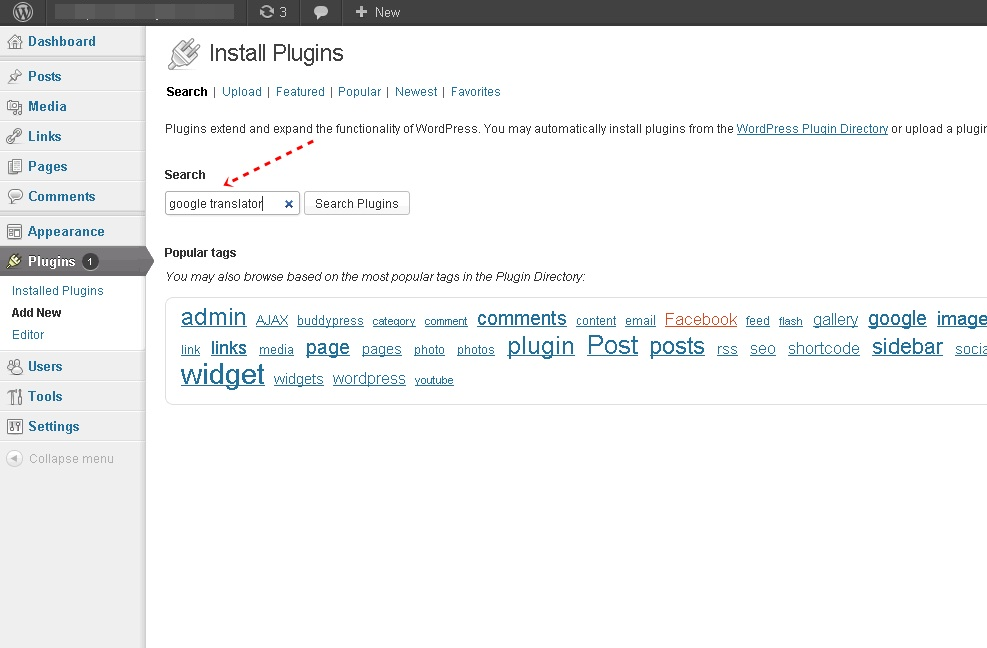
02. In plug-in page search Google Translator.
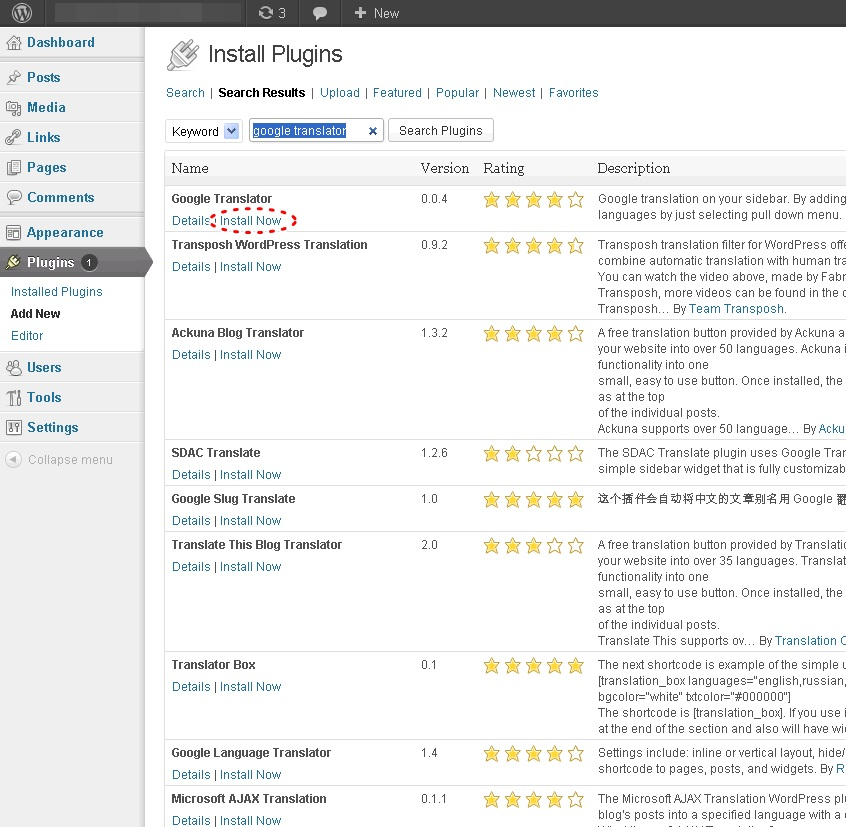
03. The search result shows around 1000 translator plug-ins. Almost all the translator plug-ins can be added in similar way. I am just picking a random one (Google Translator 0.04). Click Install Now.
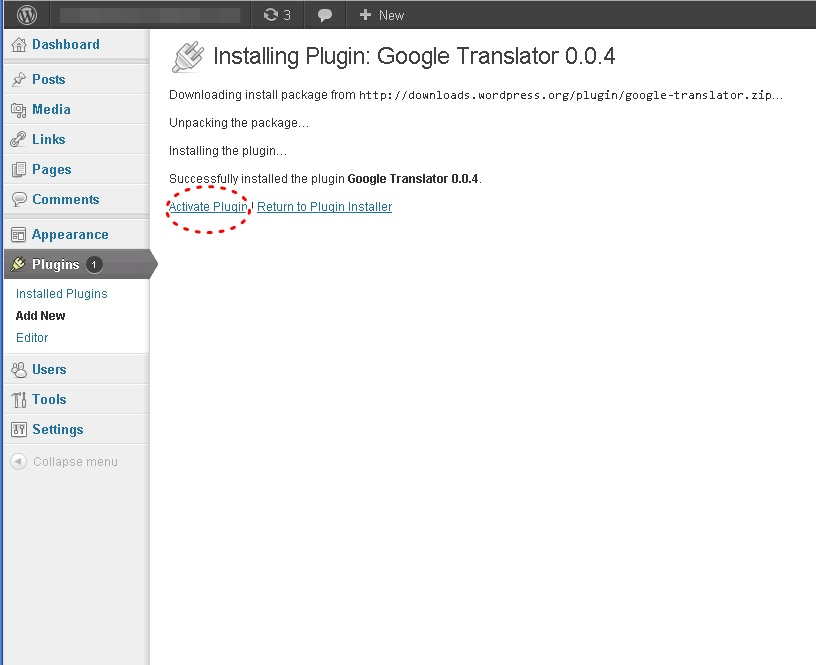
04. Now click activate plug-in to active Google Translator.
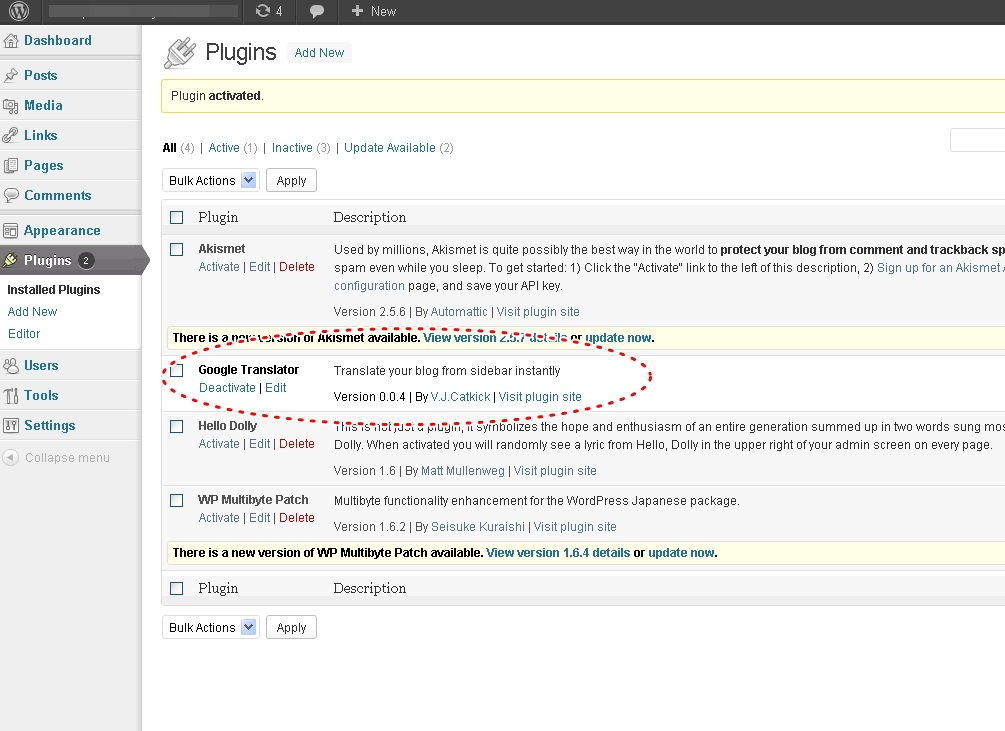
05. Now in plug-in page Google Translator will be shown.
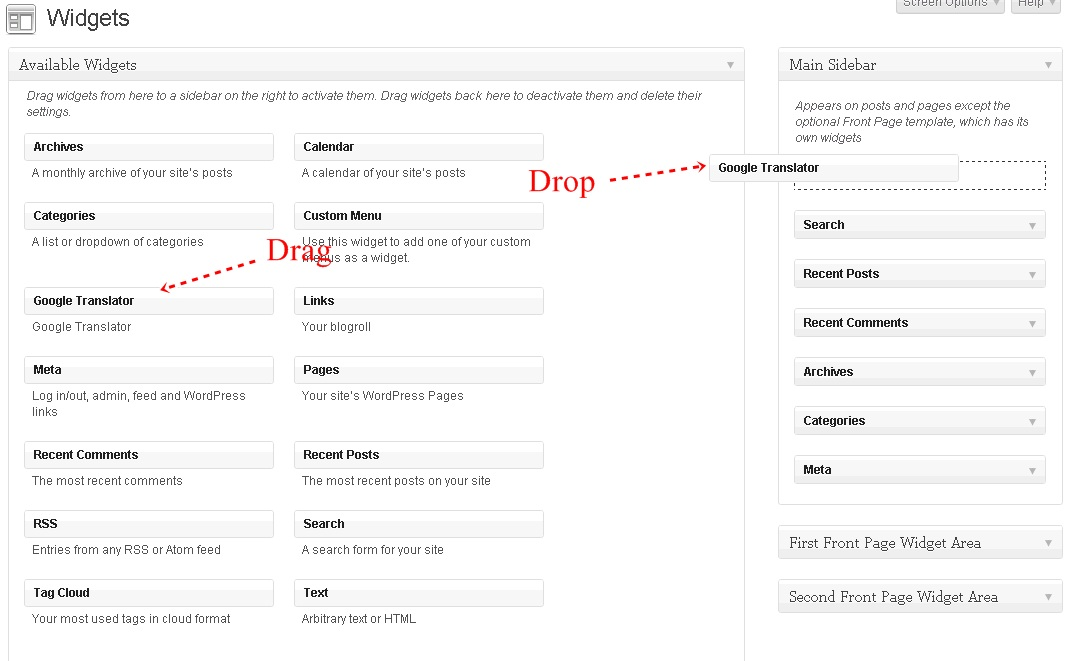
06. To add the translator bar in your home page go to Widgets tab. As you have already activated the plug-in, it will be shown under available plug-in list. Now drag and drop it on the top of main side bar.
07. Now add a title of the Google Translator and select the Base Language.
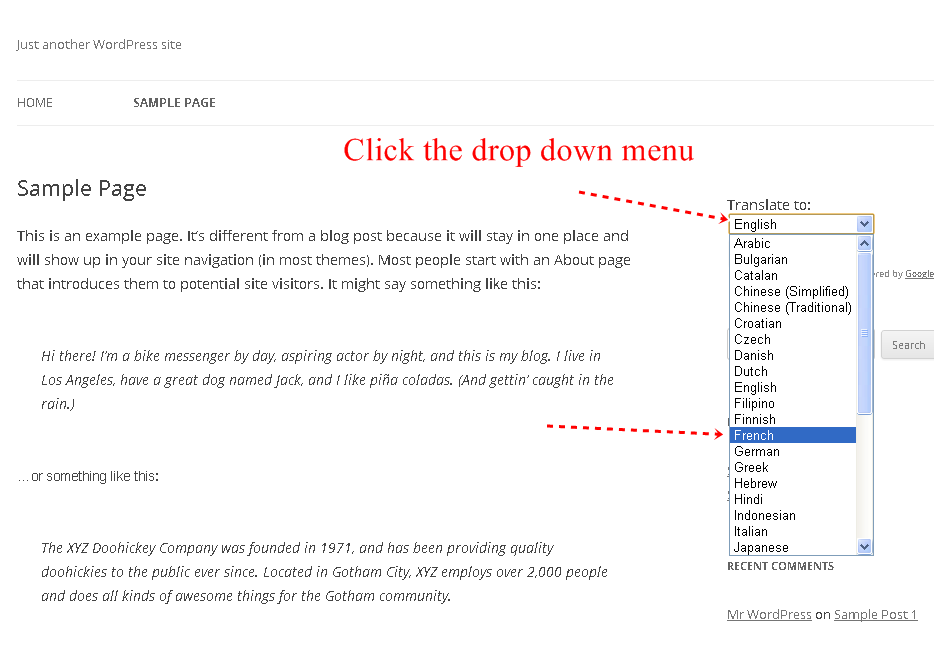
08. Now the home page will show a Language Translation bar. To translate it just select a language and click translate.

