How to Create Custom Shows in PowerPoint 2013
Custom Shows are a useful tool that PowerPoint has to offer. In many instances, you may only be required to present certain parts of a slide show you had earlier created, or you may need to make a one-off change to the order of slides in your presentation. If you learn how to create Custom Shows in PowerPoint 2013, you can pick and choose all relevant slides and put them together into a slide show. Plus, you can also change the order of the slides in your slide show without disturbing your original document at all. In this tutorial, we will walk you through how to create Custom Shows in PowerPoint 2013.
Step 1: Launch PowerPoint
Step 2: Open a presentation in which you wish to insert a Custom Show
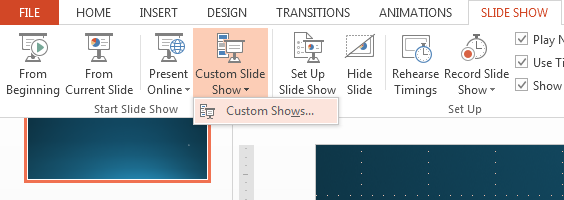
Step 3: Click on the Slide Show tab
![]()
Step 4: Click on Custom Slide Show in the Start Slide Show group and then click on Custom Shows in the dropdown menu

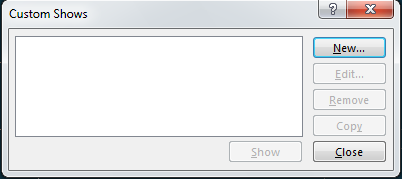
Step 5: In the dialogue box that opens, click on New…

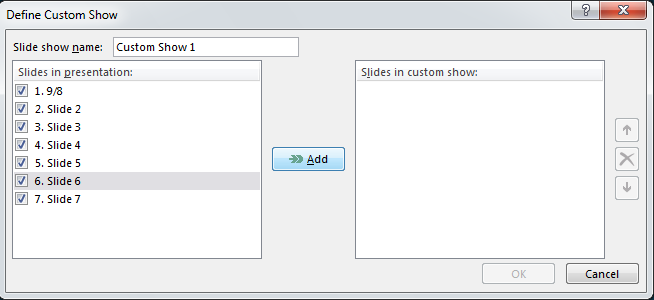
Step 6: Enter in a name for the Custom Show. Select all the slides you wish to use in your Custom Show and Add them to the Slides in Custom Show list

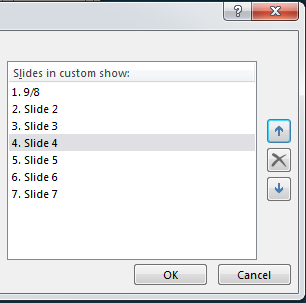
Step 7: Use the Up and Down arrows to change the order of the slides in your Custom Show

Step 8: Click OK and your Custom Show will be created and ready to be viewed

