
How to create a Macro in Word 2013
1. Open a Word document.
2. Click on View tab
3. Locate Macros in the top right corner of the Ribbon
4. Click on Macros
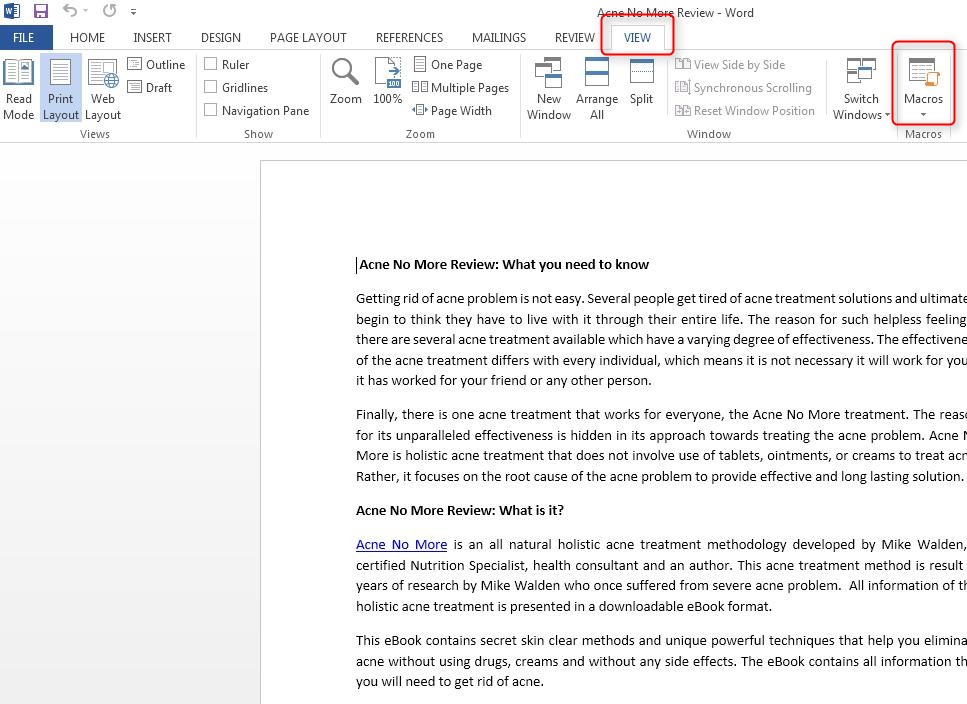
5. Click on Record Macro
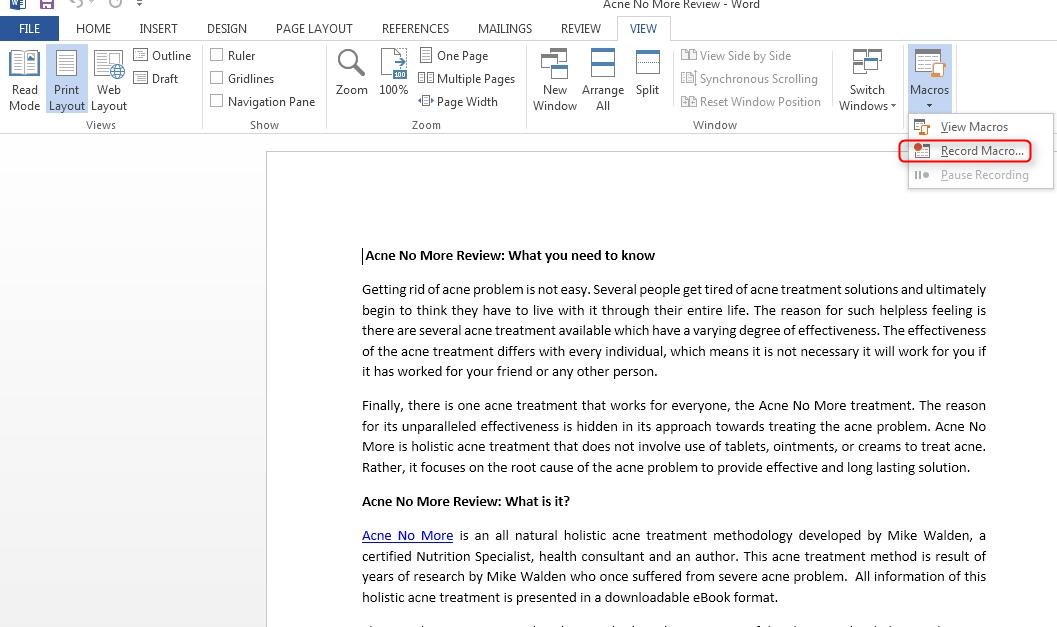
A Record Macro dialog pops up.
6. Enter appropriate Macro Name.
The Record Macro dialog pop up present’s two options to create shortcut to launch the Macro you will create
Button: you can create a button in the Quick Access Toolbar to launch the Macro
Keyboard: you can specify a keyboard sequence to launch the Macro. For example: Ctrl+Alt+M
(Note: Do not use keyboard sequence already defined by your Windows Operating system.)
7. Click on OK
Perform the steps to accomplish the task that needs to be created through Macro.
For instructional purposes, we are going to create a Macro to add a Table with 6 columns and 3 rows.
8. Click on Insert
9. Click on Table
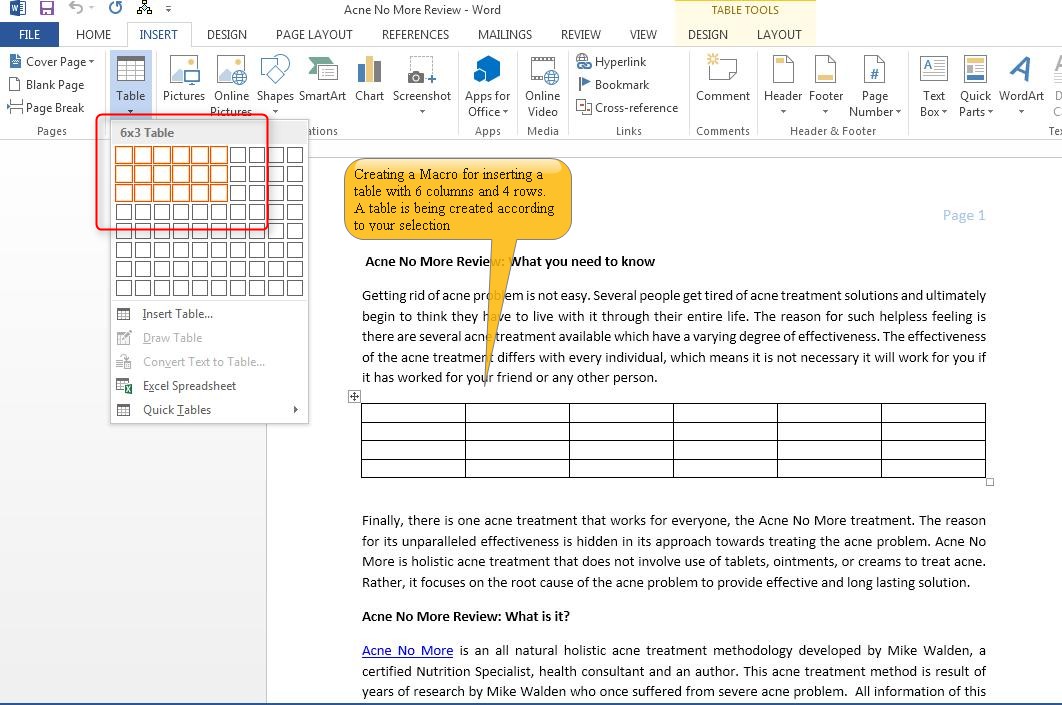
Move your mouse to select 6 columns and 3 rows
10. Click to confirm the selection
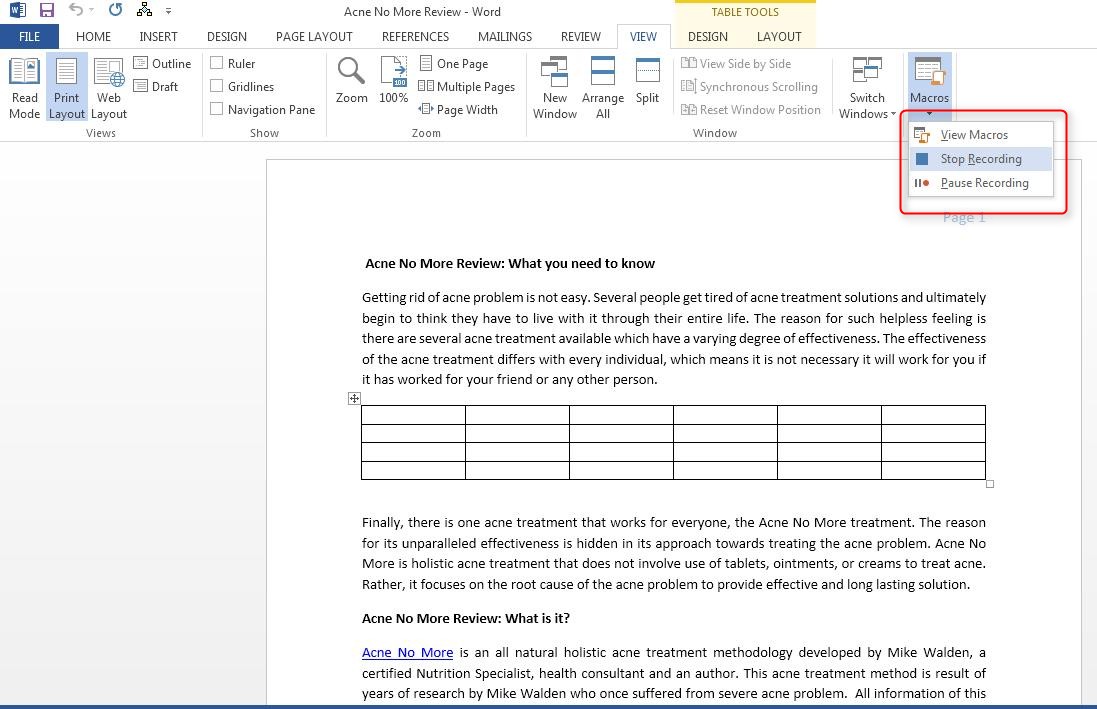
11. When the table is created, go to View tab
12. Click on Macros
13. Click on Stop Recording.
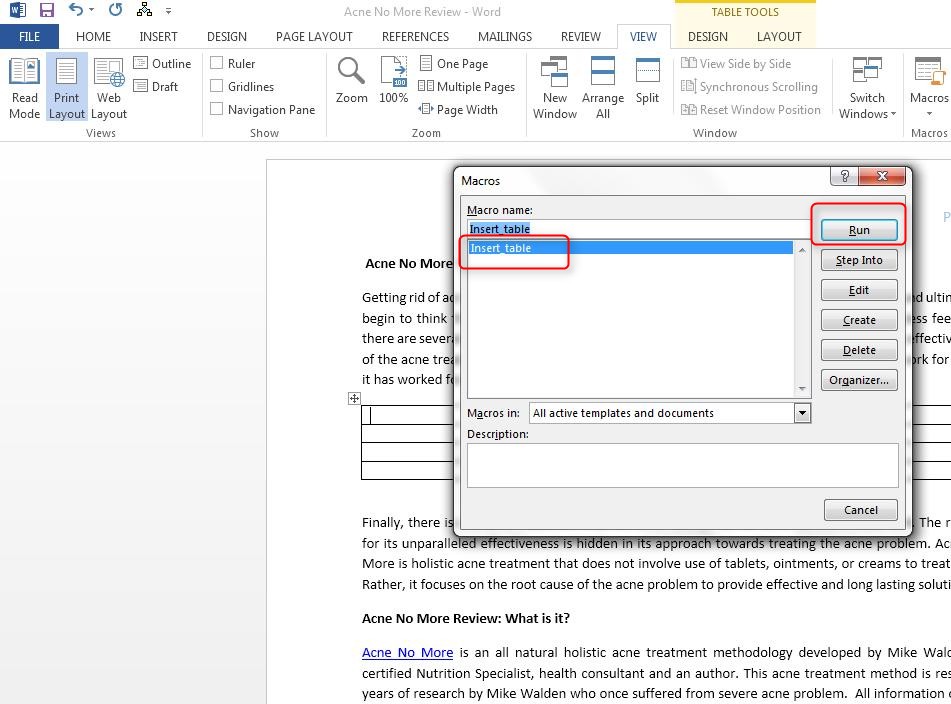
14. Your Insert Table macro is now created. Click on View Macros to see the macro
15. Select the Macro and click on Run to execute the Macro.
You can also execute the Macro through keyboard sequence or create a special button on the Quick Access Toolbar to execute the Macro.
Steps to create a button in Quick Access Toolbar to launch Macro:
Note: Start from Step 6 given above
7. Click on Button
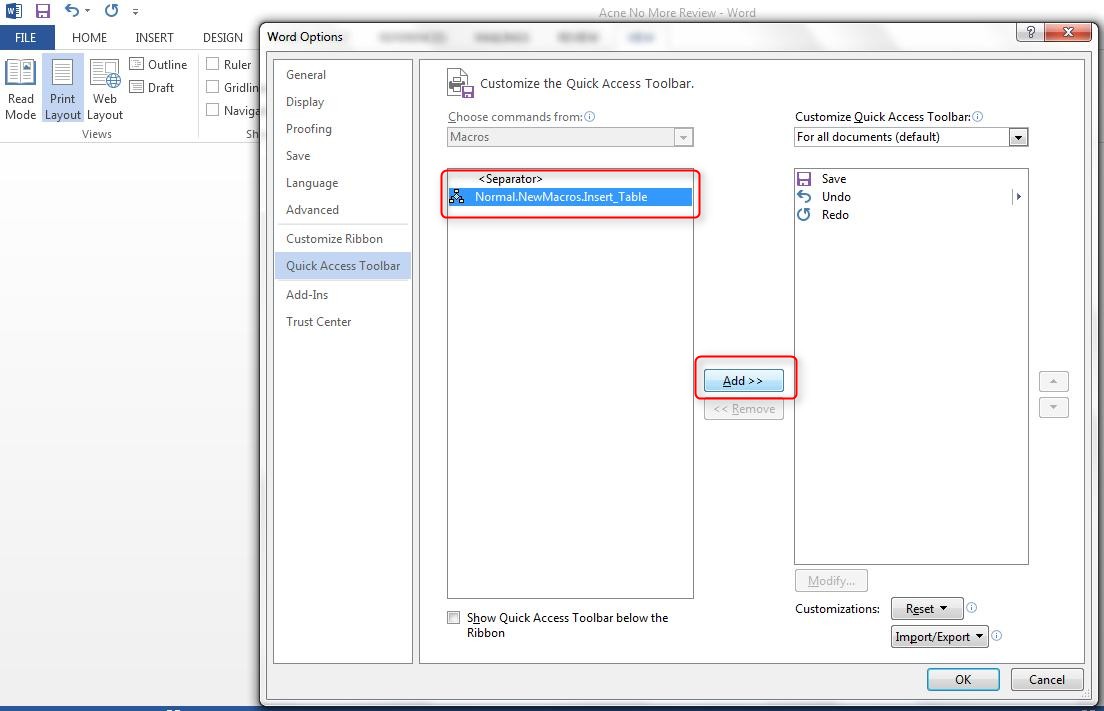
A dialog box pops”Word Options” pops up which allows you to create a button for the Macro. Locate the Macro Name you just created under <Seperator>. The Macro Name listed under <Seperator> is the display name which is different from Macro Name. It will appear when you move your mouse on the Macro button on the Quick Access Toolbar.
8. Click on Add
Your Macro Name appears in the Customize Quick Access Toolbar column on the side.
9. Select the Macro
Note: the Modify option will be grayed until you select the Macro in the Customize Access Toolbar list

10. Click on Modify
11. Enter appropriate Display Name
12. Select any symbol for the Macro
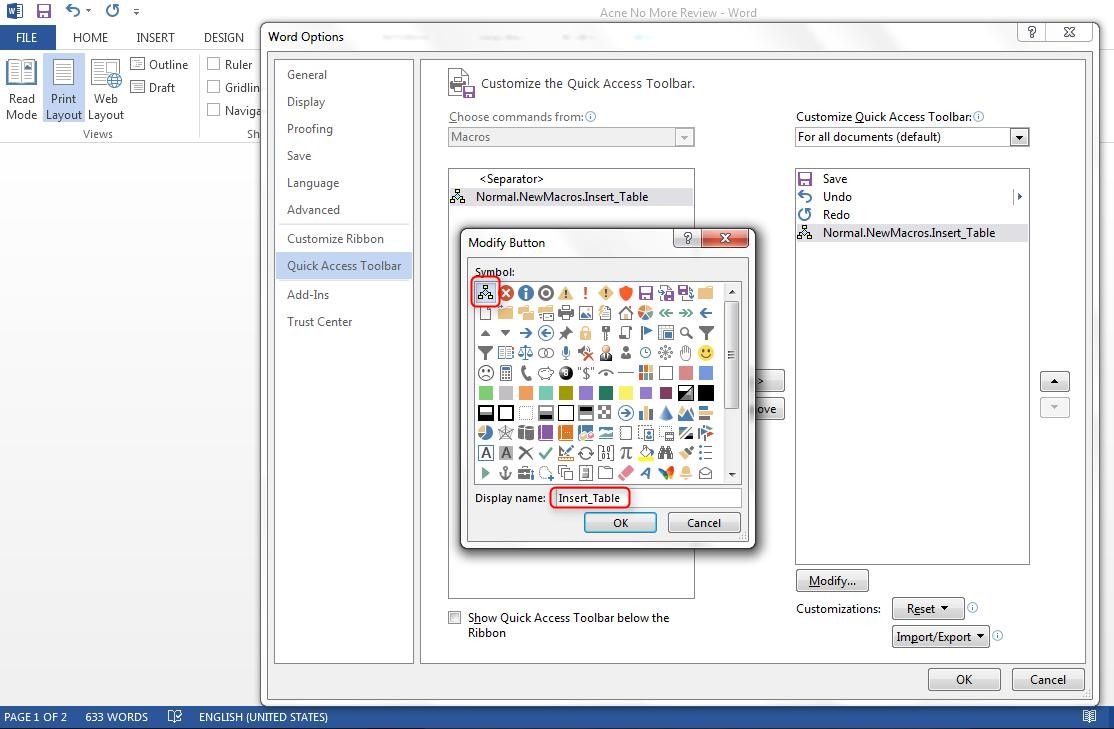
13. Click on OK
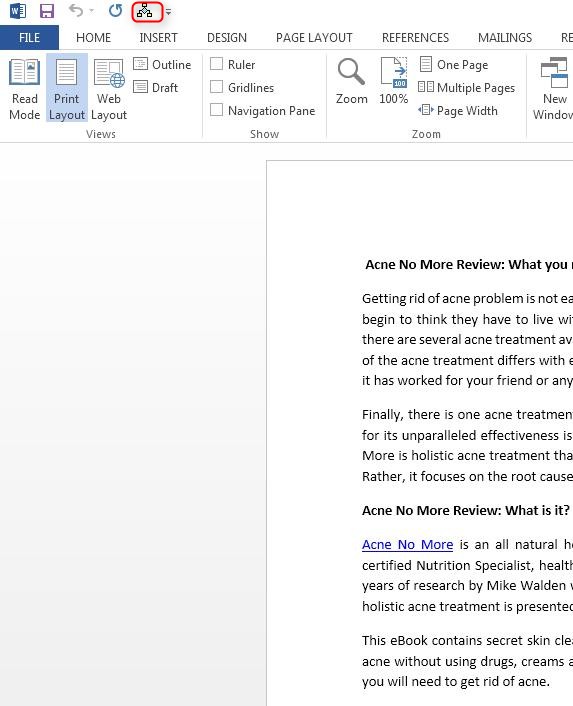
The Macro Symbol appears in the Quick Access Toolbar
13. Proceed with steps to create the Macro. (Step 8)
Click on the macro symbol on the Quick Access Toolbar to execute the macro. (After completing recording of the macro)
Steps to assign keyboard sequence shortcut to launch the Macro:
Note: Start from Step 6 given above
7. Click on Keyboard option
A Customize Keyboard window pops up
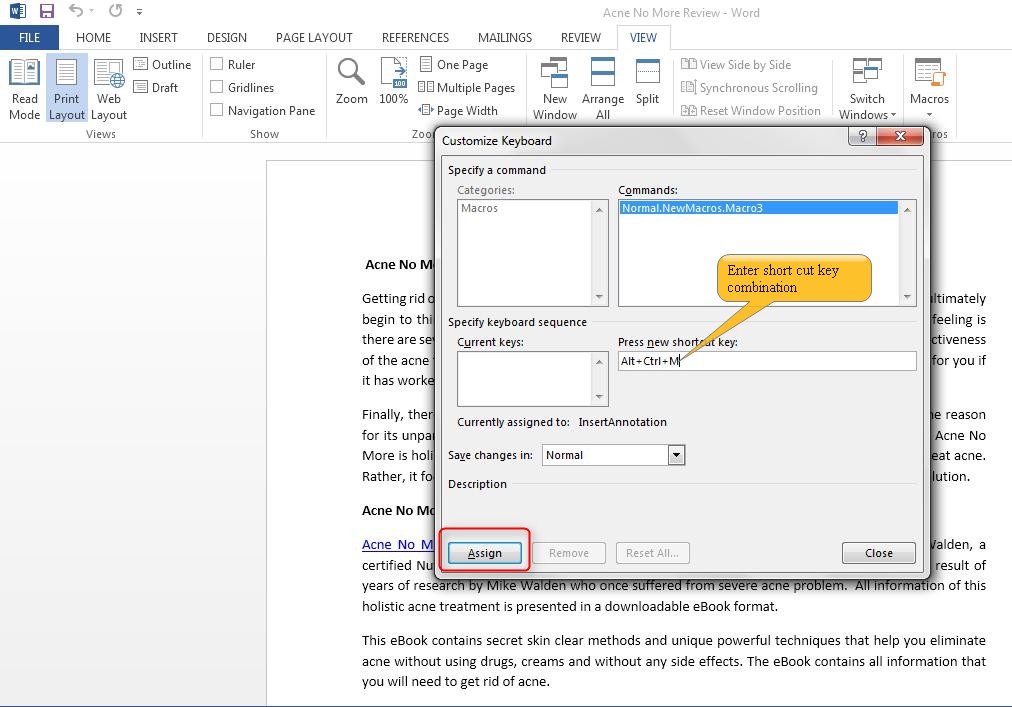
8. Enter a keyboard sequence in Press new shortcut key
9. Click on Assign
Your new keyboard sequence appears under Current keys. The keyboard sequence is now assigned to your macro.
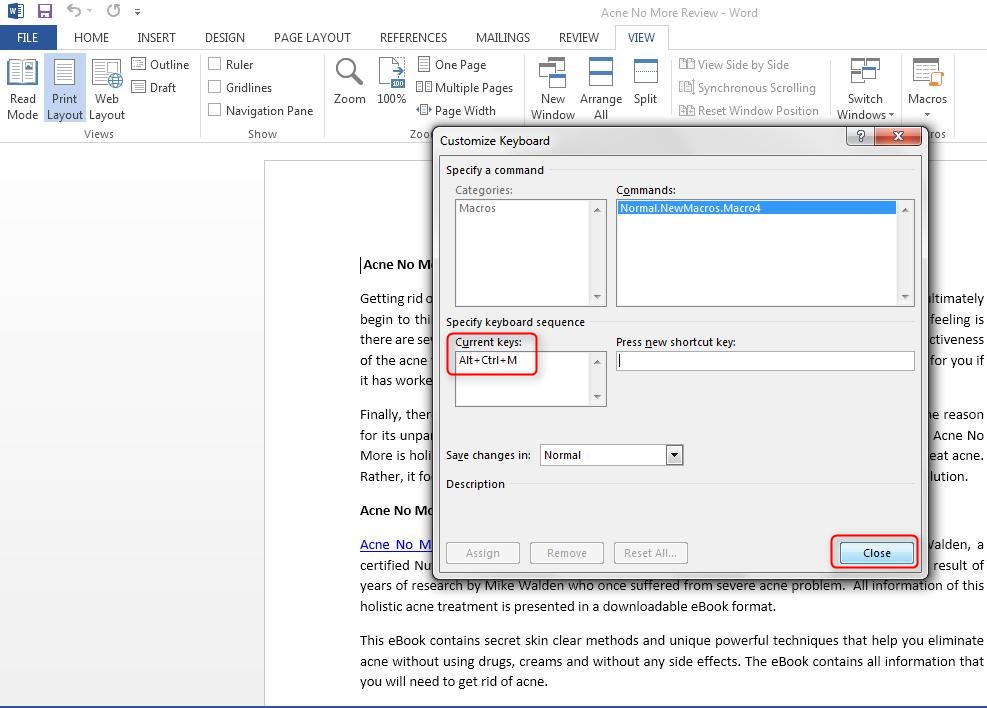
10. Click on Close
11. Proceed with steps to create the Macro. (Step 8)
Press the shortcut key combination to execute the macro after recording of the macro is completed.