How to Wrap Text around images in Word 2013. Images can speak thousand words and sometimes adding images within blocks of text makes the document look more professional. However, when you add images within blocks of text, the block of text gets split in two and the image stays in between. Also, there is lot of empty space around the image which does not look good and also breaks the flow of text. The solution to this problem is Text Wrap feature in Word 2013. Let take a look at detailed steps of how to wrap text around image in Word 2013.
1. Launch Word 2013
2. Open any document where you want the wrapped text effect.
(Note: For best results, you need to type text and then proceed to add image and wrap text around it)
3. Place you cursor in the document where you want to add an image
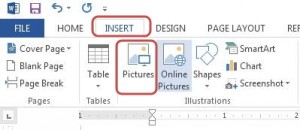
4. Click on Insert
5. Click on Pictures
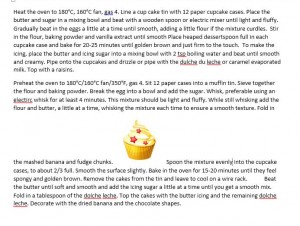
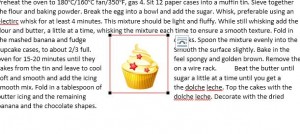
The image is now inserted and you can see paragraph split into two.
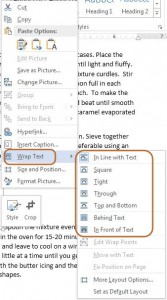
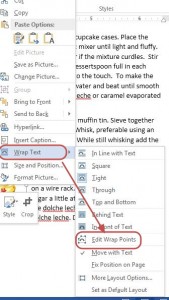
6. Select image and click right mouse button to see the menu
7. Click Wrap Text. (You have different options for Wrap Text such as Square, Tight, Through and many more. Move the mouse pointer on different options to see different Text Wrap effects.)
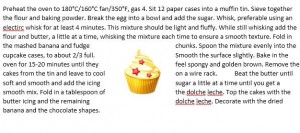
8. Click on desired Wrap Text effect. (Note: We have chosen “Tight” Wrap Text option)
You can see the text appearing on both sides of the image. However, there is lot of white space between image and text.
9. To reduce white space surrounding image, select image and click right mouse button to see the menu
10. Click Wrap Text
11. Click on Edit Wrap Points
You can now see a square box with black corner and red lines appearing as an outline of the image
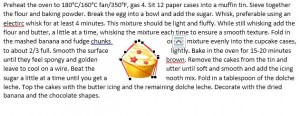
12. Click on red line and move it towards image and see the white space being reduced and text appearing closer to image
13. Click on black dot and move it towards image. Repeat the procedure to reduce white space as much as possible.
Note: You may have to rearrange text that appears faded due to image.


