How to use Mail Merge feature in Word 2013 – The Mail Merge feature in Microsoft Word 2013 presents a simple way to create multiple documents from a single template. The Mail Merge feature requires a Main Document and a Data Source. Combining these two saves time and effort. Using Mail Merge feature you can
- Send letters, emails having same information to several people simultaneously
- Print Name and Address on Envelopes or print labels using the information stored in Outlook Address book or information stored in Excel file
Let’s take a look at steps to merge the Main Document and Data Source using the Mail Merge feature.
Note: In this tutorial we will use Mail Merge feature to send an invitation letter to a group of people. The Main Document will be a letter. The Data Source is an Excel file which contains information such as Name, Designation, Department, Residential Address, City and State for each individual in the group. Using the Mail Merge feature, we will add data fields in the Main Document and capture the information stored in Excel file in the Main Document (letter)
1. Launch Word 2013
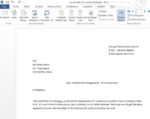
2. Open Main Document
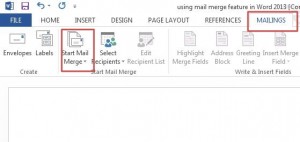
3. Click on Mailings
4. Click on Start Mail Merge
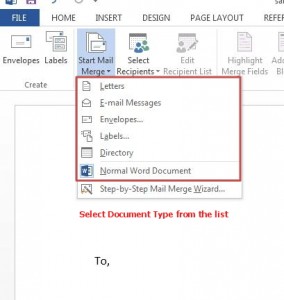
Note: In this step, you will be selecting the Main Document type. You are presented with several options such as Letters, Envelopes, Email Messages, Labels and many more.
5. Select desired Document Type from the list.
Note: For demonstration purpose, we have selected Letters from the list.
6. Select Recipients
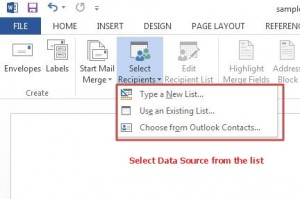
Note: In this step, you will be selecting Data Source. You are presented with 3 options which includes
- Type a New List( Select this option if you don’t have any data source)
- Use an Existing List
- Choose from Outlook contacts
Note: For demonstration purpose, we have selected Use an existing list. The Data Source we have used is in the form of an excel file.
7. Select Use an Existing List
A dialog box opens. Browse and open the target excel file (Data Source) which has the information that needs to be merged.
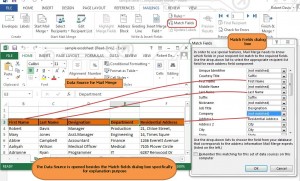
8. Click on Match Fields
(Note: This is an important step. You need to select the right recipient field list for the corresponding address field component.)
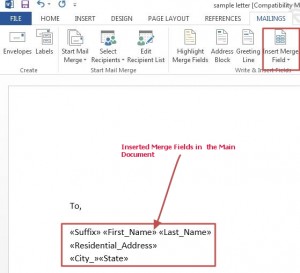
9. Position the cursor in the Main Document where you want to insert Merge Field
10. Click on Insert Merge fields and select the Merge Field you want to insert in the document
Repeat the 9-10 steps to add more merge fields in the Main Document
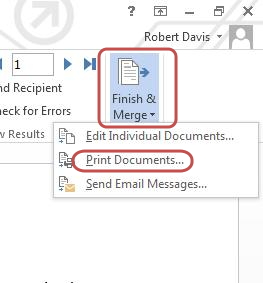
11. Click on Finish & Merge
12. Select any option from the list that corresponds to your desired output. Since, we want to print invitation letters, we will select Print Documents
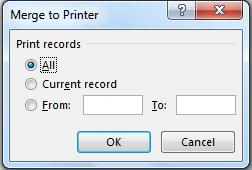
Print all is the default option selected in the pop-up dialog box. Specify the range of records if you want to print invitation letters for selected records.
Note: In this step, the records refers to each individual record in the Data Source.
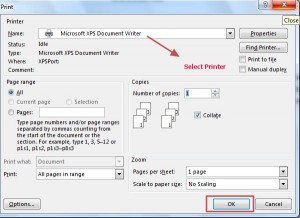
13. A new Print dialog box opens, Click on OK to print the invitation letters.

