

How to Add Headers and Footers in Word 2013
The section of a document that appears in the top margin is referred to as a header. Likewise, a footer is the section of a document in the bottom margin. Headers and footers are essential components of various types of Word 2013 documents, and so it is useful to learn how to add headers and footers in Word 2013. Anything you insert in the header or footer on a particular page will appear on all pages within that document. Once you learn how to add headers and footers in Word 2013, you will also easily be able to add details such as the date or page number onto every page of your document.
Step 1: Launch Word 2013
Step 2: Open a document in which you wish to insert a header or a footer
Step 3: Click on the Insert tab
![]()
Step 4: Click on either Header, Footer or Page Number in the Header & Footer section, depending on which you want to insert in your document

Step 5: For example, to create a header, click on the Header drop-down menu and select a style to decide the appearance of the header and where in the top margin you can insert text
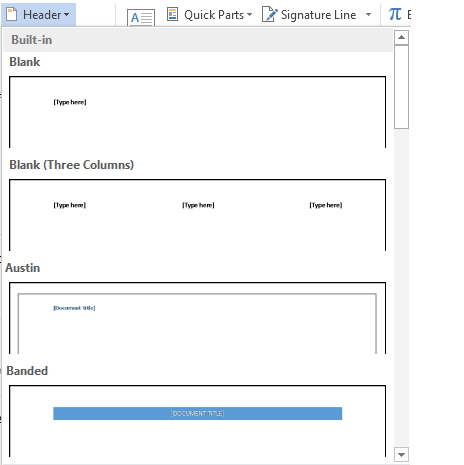
Step 6: You can add text to a header (or a footer) by clicking on [Type Here]

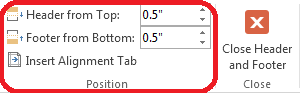
Step 7: If you want to go back to making changes to the rest of your document once you have created the header you want, you can either double-click anywhere else in the document, or click on Close Header & Footer
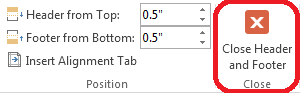
Step 8: If you want to change the position of your headers and footers, enter in the positioning in the Position section that appears on top while you are editing your header
Step 9: You can also quickly insert a header by double-clicking on the top margin of a document