In this tutorial, we’ll be teaching, how to make a group box and add option button for excel form controls.
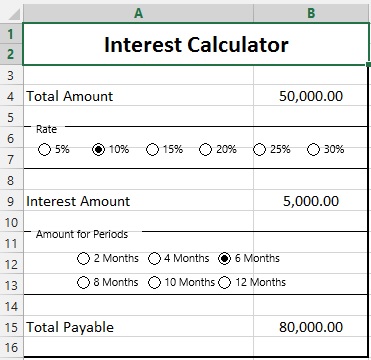
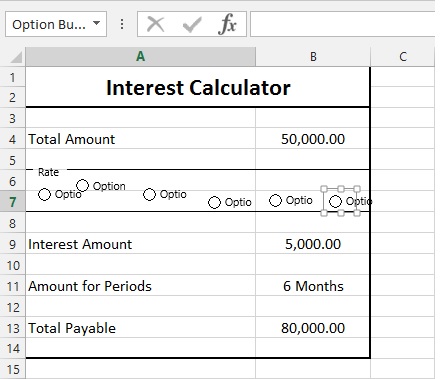
Below is the sheet, we are using for interest calculator.

Step 1:
We will use form controls. Form controls are advanced level features in excel that are hidden from normal users. So, we need to show developer tab in Ribbon. For that, we’ll right click in the blank area.

And select “Customize the Ribbon…” You’ll see the following window dialog.

You’ll find everything ticked except “Developer” option. Tick this option and Click “OK” to add Developer features to Ribbon.

Step 2:
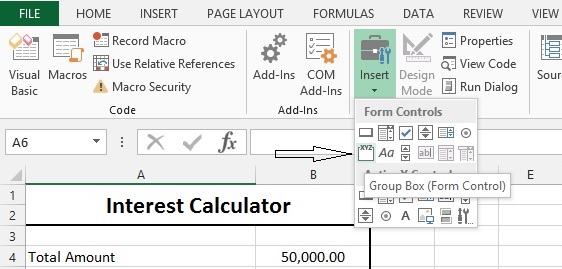
Under Developer Tab, you’ll find insert option, that’ll be holding two types of controls.

Form Controls are used in excel forms, while ActiveX Controls are used with Visual Basic. We’ll use Form Controls here.
We’ll use Group options for “Rate” and “Amount of Periods”. So, we’ll remove the row holding “Rate”. And insert two rows for Group Box.
Select Group box, and Move cursor to Row 6. Press Alt and Click & Hold mouse button and drag it to row 6 and 7 under Column A & B.
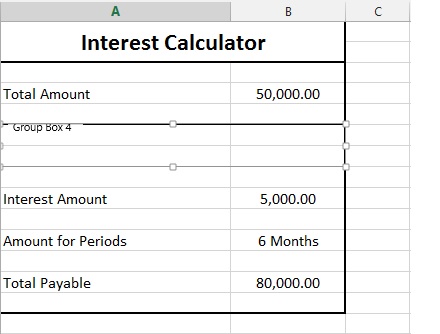
Change “Group box 4” Caption of group box by double tap on it and Write text to “Rate”.
Step 3:
Now we need to add Option button from Form Controls again. So we’ll select and insert them into Group box.

After Selecting Option Button from Form Control, Move mouse Cursor into Group Box, Press Ctrl and Draw with mouse button. It is the best practice and more professional to start from left side aligned.
Step 4:
To change the caption of Option box, Press Ctrl and Click on option to get focus and Click on Text to edit.
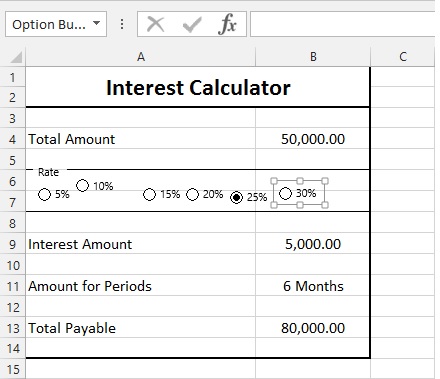
After changing caption of Option boxes, you need to check that clicking on one option box should diminish the other selection of option box. It means one option box should be selected at one time.
Step 5:
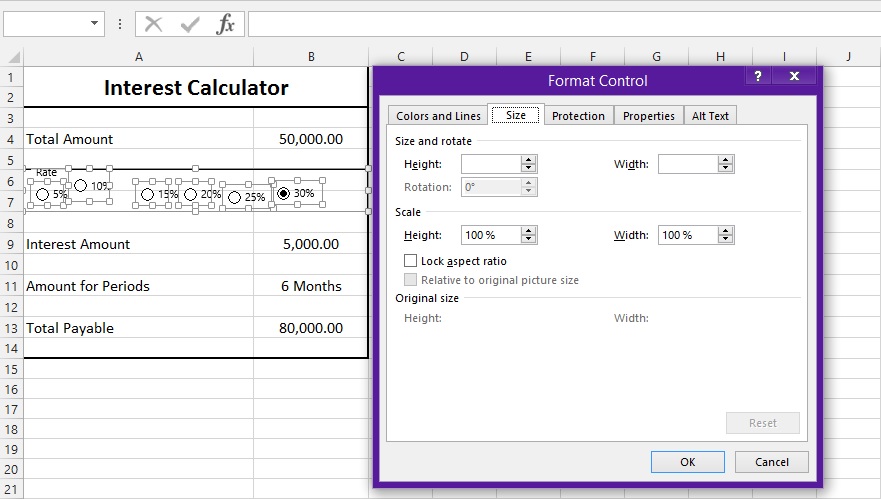
Now, you see the option boxes are not of same size. We can resize them equally by focusing and moving there edges with Mouse. But that is not so professional way to do as there will be some difference left. So we need to resize it using Format tool. Move cursor to any option button and get focus. Right click on it and select “Format Control”. You’ll get a window Dialog in front.
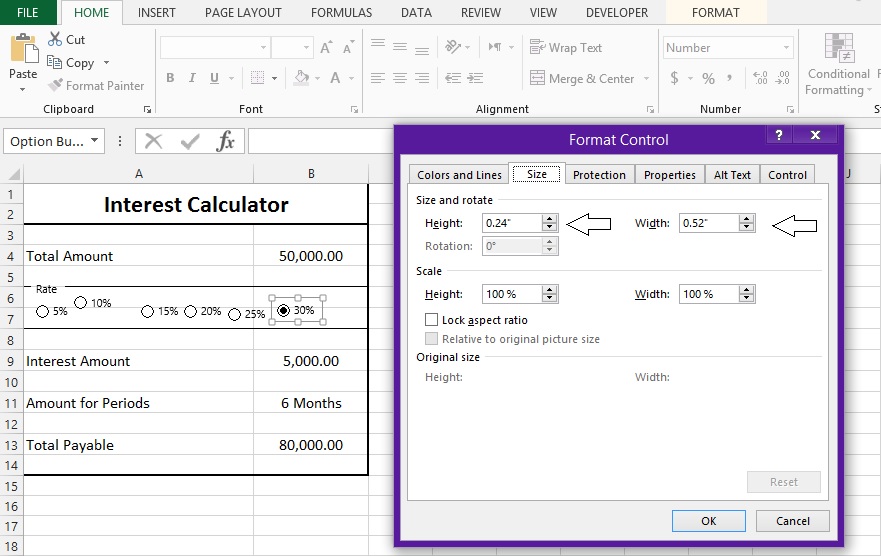
Note Height and Width of one Option button.
Step 6:
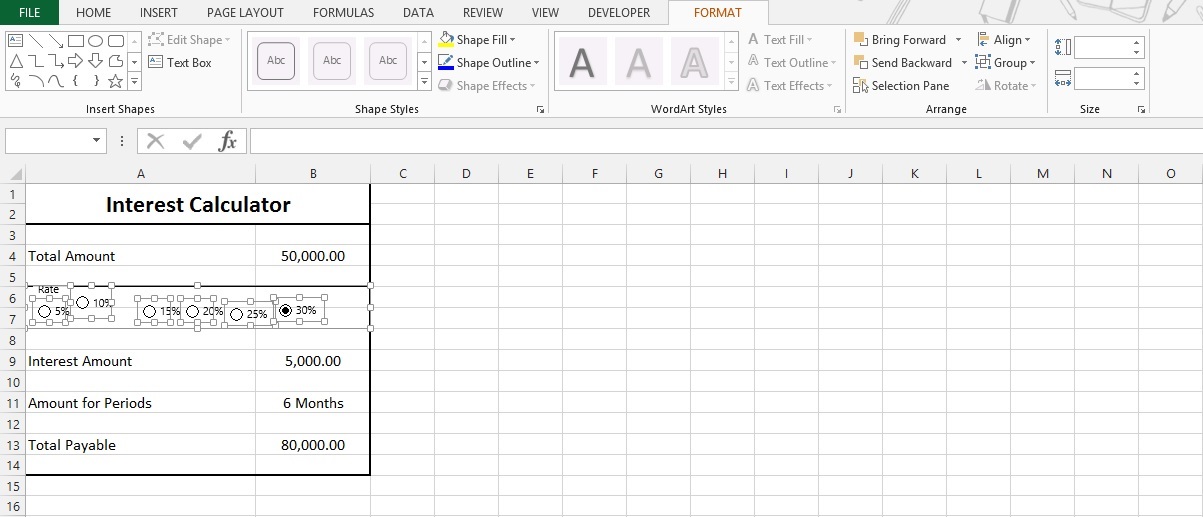
Now, Get focus of one option button and Press Ctrl and click on all Option buttons to select.
And Right click on “Format Object” option.
Enter those values you found in Step 5, in Height and Width. And you’ll see all option buttons in same size.
Step 7:
We need to align all the option buttons. So, again we’ll select all by selecting them by pressing Ctrl and Mouse click. And then Move to “Format” tab. And select “Aling Middle” in “Align” Option.
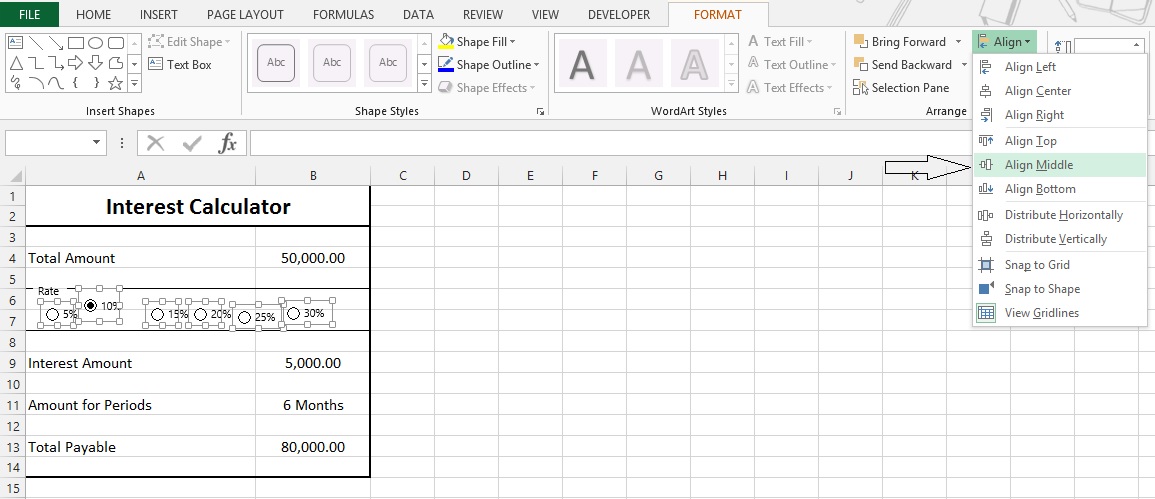
And then we’ll relocate them with equal gaps in between them by selecting “Distribute Horizontally” in “Align” Option.

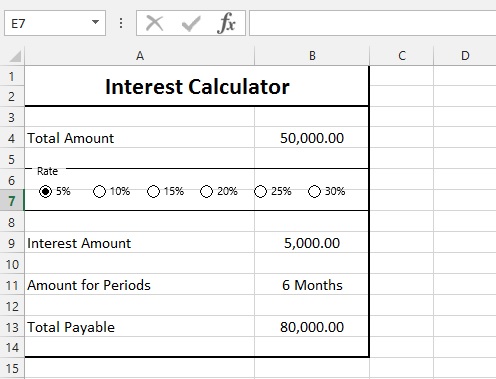
You’ll get this group like
Step 8:
Same Steps to follow for “Amount for Periods”. You’ll get it like: