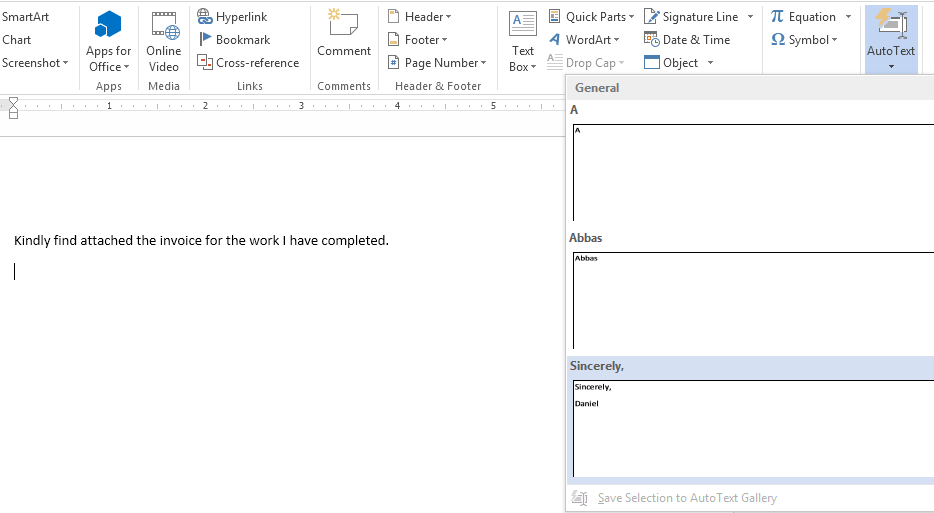
How to Create AutoText Entries in Word 2013
Those who are willing to take time out to learn how to create AutoText entries in Word 2013 will save a lot of time when they have to insert words and phrases that they commonly use in their documents. For instance, when you use the same closing lines in letters, you won’t need to waste time typing it every time if you know how to create AutoText entries in Word 2013. In this tutorial, we will teach you how to use AutoText entries in Word 2013.
Step 1: Launch Word 2013
Step 2: Open a document in which you wish to use AutoText
Step 3: Click on the File tab
![]()
Step 4: Click on Options

Step 5: Select Customize Ribbon
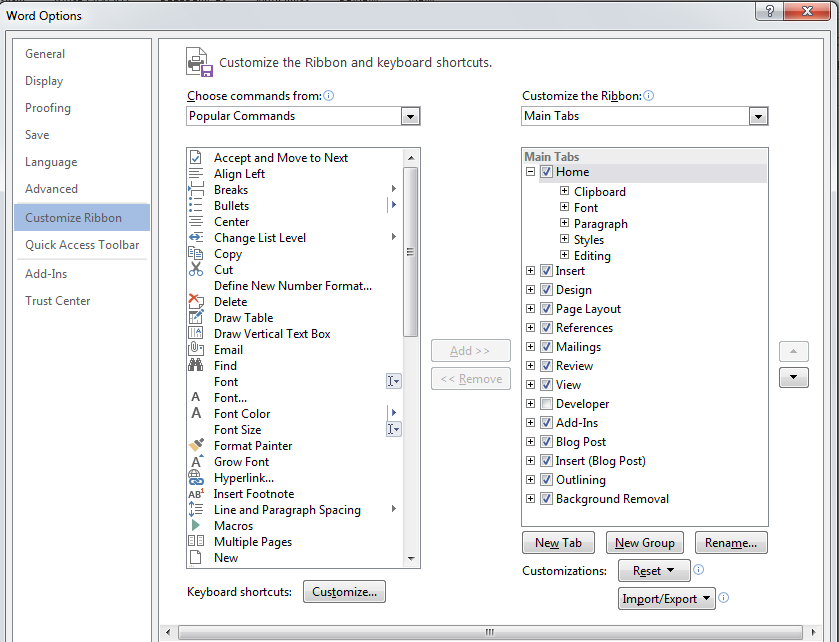
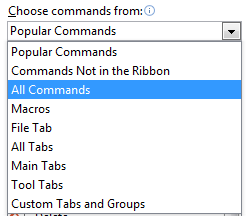
Step 5: Select All Commands in the Choose Commands box
Step 6: Find and select AutoText, click Add and then click OK
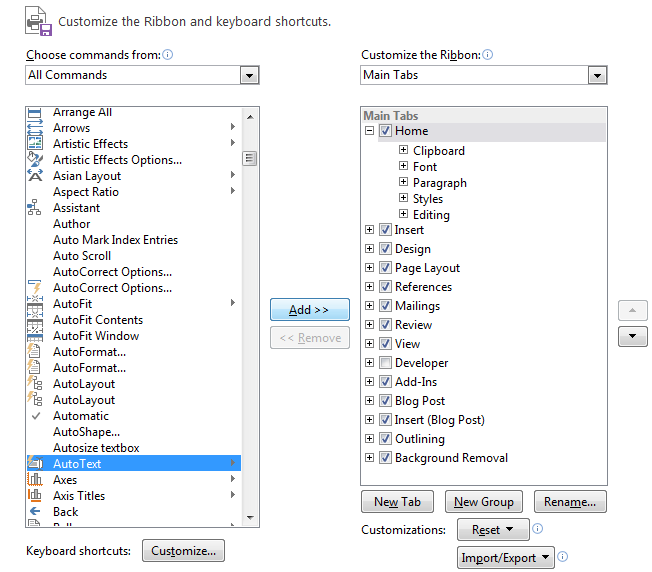
Step 7: Now you have added the AutoText button onto the Home page. Click on the Insert tab
![]()
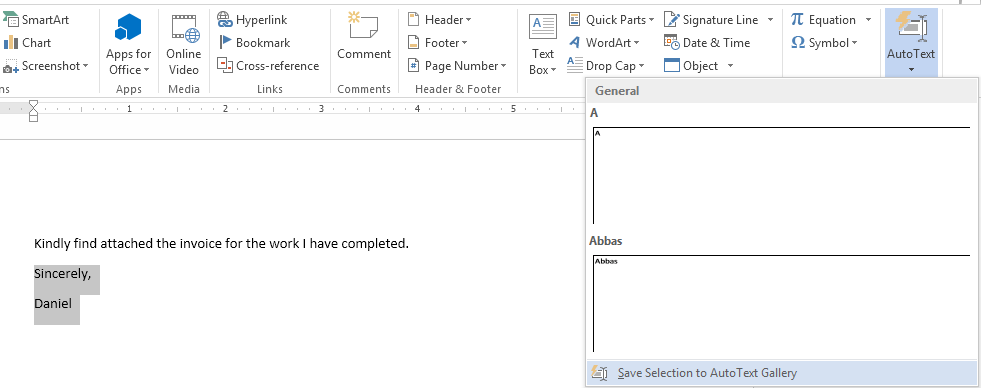
Step 8: Add text that you frequently use as an AutoText entry by highlighting it, and clicking on the AutoText arrow and selecting Save Selection to AutoText Gallery
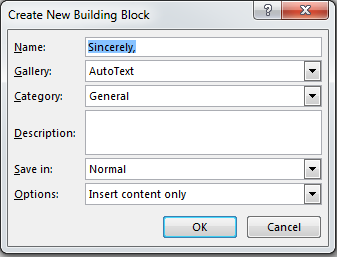
Step 9:Click OK on the dialogue box
Step 10: Move the cursor where you wish to insert the AutoText entry, click on the AutoText arrow in the AutoText section

Step 11: Choose the AutoText entry that you just created
