Browse Object & Other Built-In Keystrokes in Word 2010
While we’re visiting over there on that side of the Word screen, let’s take a look at another sometimes-overlooked control — Select Browse Object. Shown in Figure 2-11, this control determines what happens when you click the Previous or Next buttons that are immediately above and below the Select Browse Object control. It also determines what happens when you press Ctrl+Page Up or Ctrl+Page Down.
By default, the browse object is set to page. Clicking the Previous or Next button performs page up or page down actions. When the default object type is active, the browse buttons (Up and Down) are black. When a non-default object type is active, the browse buttons change to blue.
For example, click the Select Browse Object button and choose Browse by Table. If you hear an error beep, that means the current document does not contain any tables between the insertion point and the end of the document. Nonetheless, the browse buttons turn blue, and they now ‘‘mean’’ previous table and next table.
FIGURE 2-11: Select Browse Object determines the actions performed by the Previous and Next buttons.
If you ever click a browse button and don’t get the expected default page up/page down behavior, take a look at the color. If the button is blue, then that’s the problem. To reset the browse behavior to the default, click the Select Browse Object button and choose Page.
What makes this a little tricky is that there are ways other than clicking that button to change browse behavior. For example, if you perform a search, the browse buttons now become Find Previous and Find Next. If you perform a go to and go to the next field, then previous field/next field become the browse actions. Hover your mouse pointer over each of the twelve object types to explore the possibilities. If you keep these objects in mind, then this feature can become a tool, rather than just an annoyance.
Note
One browse feature is Browse by Edits. Word remembers the current and previous three places where editing occurred (anything that changes the status of the document from saved to dirty *). Hence, when Browse by Edits is the browse behavior, the Previous and Next buttons cycle the insertion point among those four locations. The Shift+F5 keystroke (assigned to the GoBack command) performs the same action as the Previous button when the browse object is set to Browse by Edits.
*When a document contains a savable change — one that will actually change the contents of the file when saved to disk — it is marked by Word as dirty . Some actions make a file dirty, and some don’t. If you simply press Page Up or Page Down, or otherwise scroll around in the document, that does not affect the saved/dirty status. If you type a character, perform some formatting, or change a document’s properties, however, that will make the file dirty , requiring a save to preserve those changes. Typing a character and immediately deleting it also makes a file dirty. That’s a useful trick that I describe elsewhere in this book.
Keyboard
With Word 2007 and 2010 come some keyboard changes from Word 2003 and earlier. Perhaps surprisingly, as you’ll learn, most legacy keystrokes still work, even though Word’s menus are gone.
What works differently? One of my favorite keystrokes is Ctrl+Shift+S, which in Word 2003 and earlier moves the focus to the Style control on the Formatting toolbar. Given that there is no Formatting toolbar in Word 2010 and that there is no comparable Style control on the ribbon, Ctrl+Shift+S pretty much has to be at least a little different. If you still have Word 2003, open it, press Ctrl+Shift+S, tap the first letter of a style that’s not currently selected, and then use the down arrow key to go to the style you had in mind. Press Enter to apply the style.
Now try the same thing in Word 2010. Pressing Ctrl+Shift+S activates the Apply Styles task pane, and the keystrokes otherwise seem to work the same way. However, the Apply Styles task pane doesn’t go away. It’s stays there — in your way, more likely than not.
How do you dismiss the Apply Styles task pane? Well, you could click its X, although that defeats the shortcut key non-mouse advantage of Ctrl+Shift+S. Unfortunately, pressing the escape key simply returns the focus to the document without dismissing Apply Styles. To dismiss it (as well as any other task pane) using the keyboard, press Ctrl+space, C. Note that for this to work, the task pane must have the focus, so you might need to press Ctrl+Shift+S and then Ctrl+space, C to get it to work. Did I mention that not all changes are improvements?
Other Built-In Keystrokes
Word boasts a broad array of keystrokes to make writing faster. If you’re a fast touch-typist, you might not care to have to reach for the mouse to make a word bold or italic. You might not want to reach for the mouse to create a hyperlink. If you’ve been using Word for a long time, you very likely have memorized a number of keystrokes (some of them that apply only to Word, and others not) that make your typing life easier. You’ll be happy to know that most of those keystrokes still work in Word 2010.
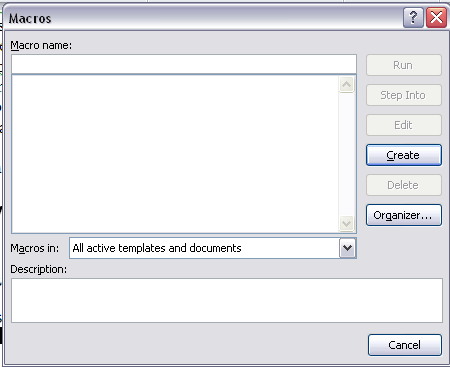
Rather than provide a list of all of the key assignments in Word, I’m going to show you how to make one yourself. Start by pressing Alt+F8. In the ‘‘Macro name’’ field type listcommands and press enter. In the List Commands dialog box choose Current Keyboard Settings and press Enter.
Presto! You now have a table showing all of Word’s current keyboard settings. If you’ve reassigned any built-in keystrokes to other commands or macros, your own assignments are shown in place of Word’s built-in assignments. If you’ve redundantly assigned any keystrokes,
all assignments will be shown. For example, Word assigns Alt+F8 to ToolsMacro. I also assigned Ctrl+Shift+O to it. Therefore, my ListCommands table shows both assignments. The table also shows those assignments and commands you haven’t customized.
Tip
If you want a list of Word’s default built-in assignments, open Word in safe mode (hold down the control key as Word is starting and then click Yes) and repeat this exercise.
Office 2003 Menu Keystrokes
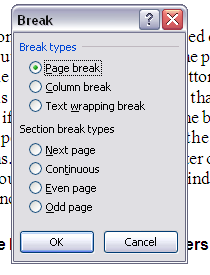
One of Microsoft’s aims was to assign as many legacy menu keystrokes as possible to the equivalent commands in Word 2007 and 2010, so if you’re used to pressing Alt+I,B to choose Insert ➪ Break in Word 2003, you’ll be glad to know it still works. So does Alt+OP, for Format ➪ Paragraph. Liking this so far, are you? Great!
Now try Alt+HA for Help ➪ About. It doesn’t work. In fact, none of the Help shortcuts work, because that Alt+H shortcut is reserved for the ribbon’s Home tab. Some others don’t work either, but at least Microsoft tried. Perhaps you can teach this new dog some old tricks.
Some key combinations can’t be assigned because the corresponding commands have been eliminated. There are very few in that category. Some other legacy menu assignments haven’t been made in Word 2010 because Microsoft is grappling with some conflicts between how the new and old keyboard models work. There are, for example, some problems with Alt+F because that keystroke is used to select the File tab. For now at least, Microsoft has resolved to use a different approach for the Alt+F assignments. Press Alt+I and then press Alt+F to compare the different approaches.
Custom Keystrokes
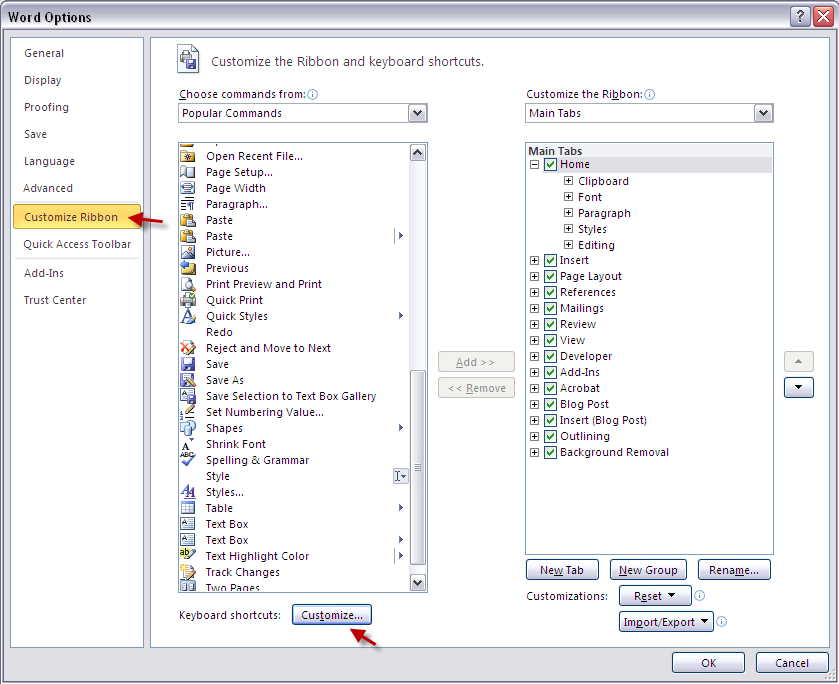
You can also make your own keyboard assignments. I cover this in glorious detail in Chapter To get a sneak peak, choose File ➪ Options ➪ Customize Ribbon ➪ Customize.
Tip
If you’re a keyboard aficionado, to simplify your life, assign Alt+K (it’s unassigned by default) to the ToolsCustomizeKeyboard command. Then, whenever you see something you want to assign, press Alt+K and you’re off and running. To assign Alt+K, choose File ➪ Options ➪ Customize Ribbon ➪ Customize. Set Categories to All Commands. In Commands, tap the T key to skip to the Ts. Find and select ToolsCustomizeKeyboard, Click Press New Keyboard Shortcut Key and then press Alt+K (or whatever other assignment you might find preferable or more memorable). Make sure that Save Changes In is set to Normal.dotm (assuming you don’t want it saved somewhere else). Click Assign, and then click Close, and click Cancel to dismiss the Word Options dialog box. If you’ve told Word to prompt before saving changes in Normal.dotm, then make sure you say Yes to saving this change (when prompted). _


![6dd]](http://wizapps.org/word/wp-content/uploads/2012/07/6dd.png)