Posts

How to Use the New Crop Tool in Photoshop CS6

When you start to crop in Photoshop CS6, you will notice that it is very much different, even strange and very uncomfortable. But it just seems that way. The tool is actually made much more comfortable and many more new options.

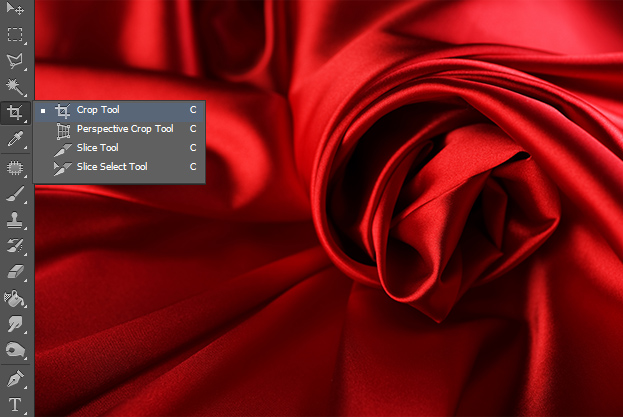
01. You can find the crop tool as before – in the toolbar.

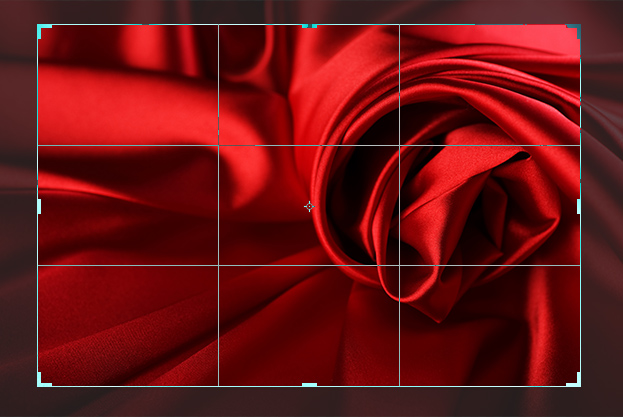
02. Immediately, after clicking the crop tool, the picture will get selected. Now you can start cropping like in the old times, just move the corners or sides of the selection. The new feature is that you can now move the about to be cropped area. But instead of the selection moving, like in the old days, now the selection stays foot and you’ll be moving the picture inside the selection. Press Enter to confirm the crop.

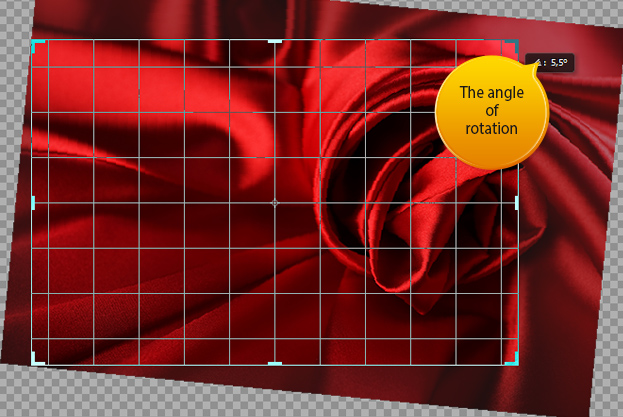
03. If you want to rotate the crop, then again, the image will rotate, not the crop selection. Also, now you do not have to be afraid to crop outside of the picture, the tool will make sure not to select anything that is left outside, of course, if you want it so.

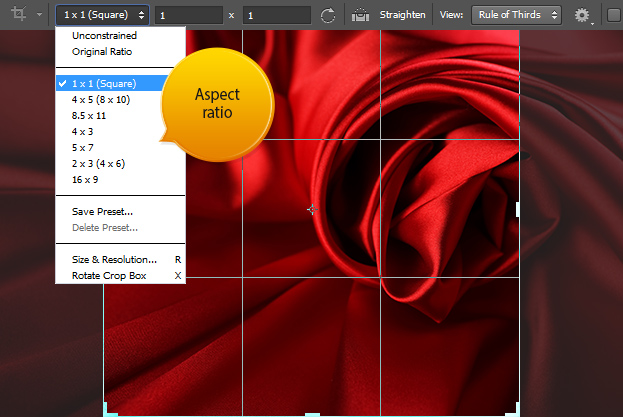
04. Its also very easy to change the aspect ratio, just click on the drop-down menu and pick most useful for you. There you can also get your original ratio back or save your own.

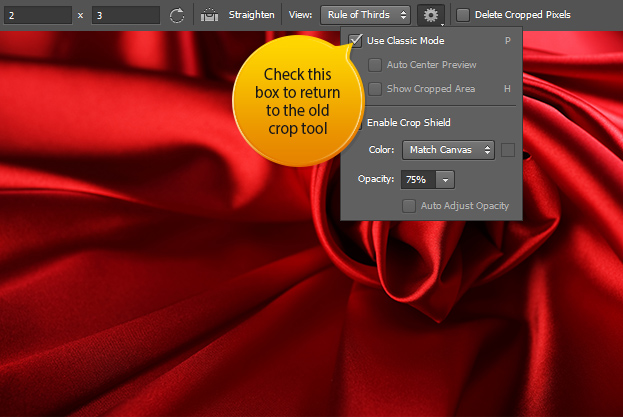
05. Still don’t like it and want the old back? No problem! Just click on the small wheel at the top of the crop menu and check the Use Classic mode Mode and you can start using the old crop tool immediately.

06. One more very useful option within the crop tool is the option whether to delete or not delete the cropped area. Check the box so that everything that is outside the cropped are will be deleted and uncheck the box if you want everything to remain, just out of your eyes. This way you can always go back to your original size without losing any pixels.

No doubt the new Crop tool is better and more useful in Photohsop CS6.

New Vector Layer Shape Options in Photoshop CS6

Custom shapes have been in Photoshop as long as we remember, but now, in Photoshop CS6, they come with very comfortable and useful chages that make working with the shapes easier than ever.

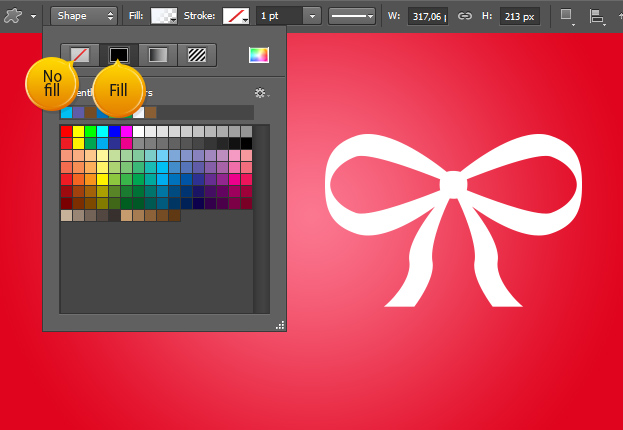
01. Just make your shape like always with the Custom Shape tool from the toolbar and now when you’d want to change the color of the shape, just go in the upper menu, click on the Fill and you will see many options there. The first two are:

– No fill – which takes any fill away from the shape making it transparent

– Fill – pick any solid color

the easy thing here is that you just have to one-click them and the change is immediately added on your shape.

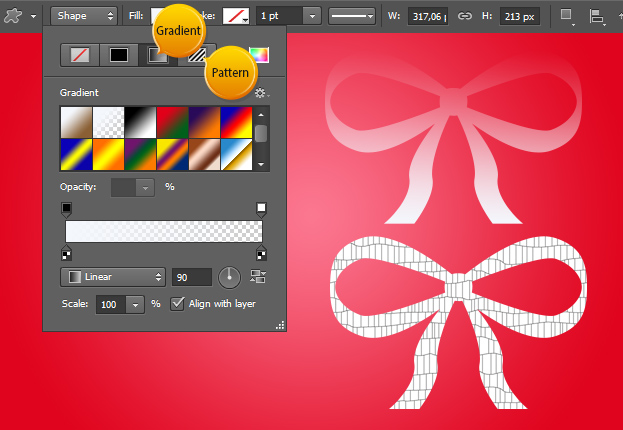
02. The two last option under the Fill are:

– Gradient – choose a gradient overlay on your shape

– Pattern – choose a pattern for your shape

Again, the effect will be added with just one click on the chosen color or pattern.

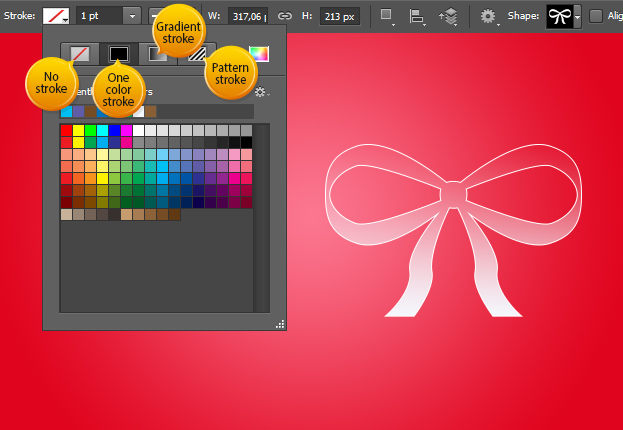
03. But that is not all! Now you can also add the same easy way a stroke around your shape. And like with fill, you have different stroke options – no stroke at all, one-color stroke, gradient stroke or even pattern stroke. All just one click away!

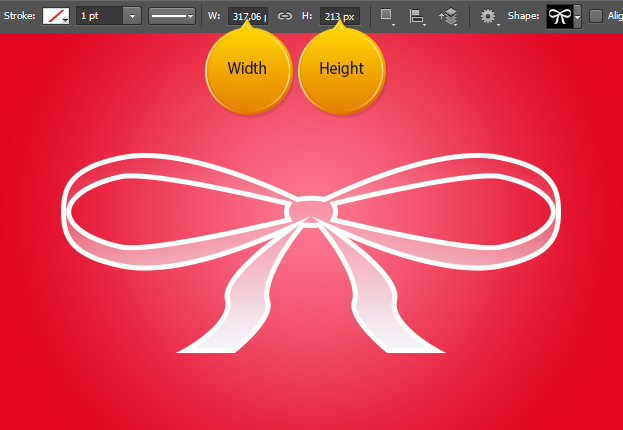
04. To change the stroke size, just enter a number and hit Enter button.

05. You can also change the width and height of your shape easily by just inserting the number.

And that is all you need to know about the new custom shape changes in Photoshop CS6.

How to Use the New Tilt-Shift Blur in Photoshop CS6

The third new Photoshop CS6 blur is the Tilt-Shift. With that you can add a linear shaped blur to any image at the same time having control over every single detail what is blurred or what is not.

Open a picture to add a blur on:

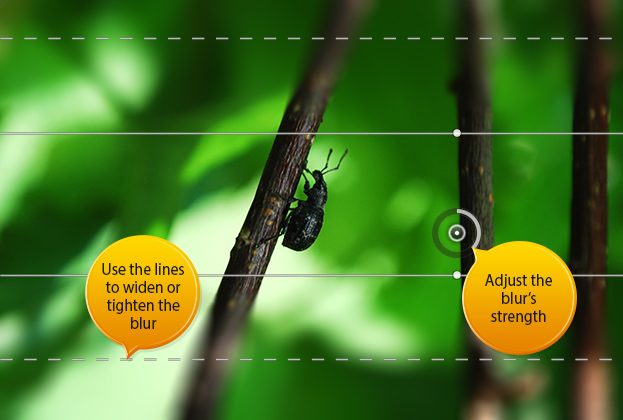
Go to Filter > Blur > Tilt-Shift. A new preview will open with 4 lines and a circle. From the circle you can move the blur around and adjust the strength of it. The lines you can drag up or down to adjust the blur distances and location.

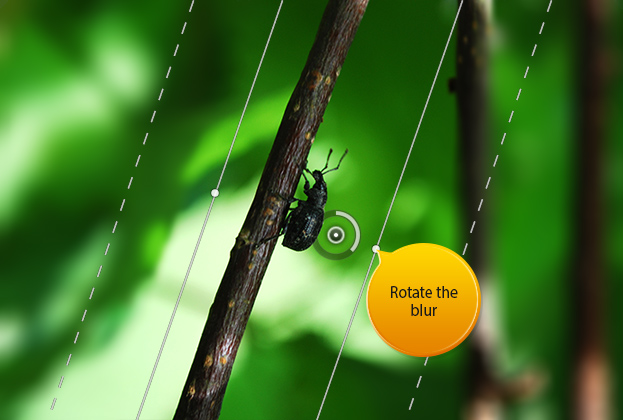
From the small white dots you can rotate the blur according to your wishes and picture.

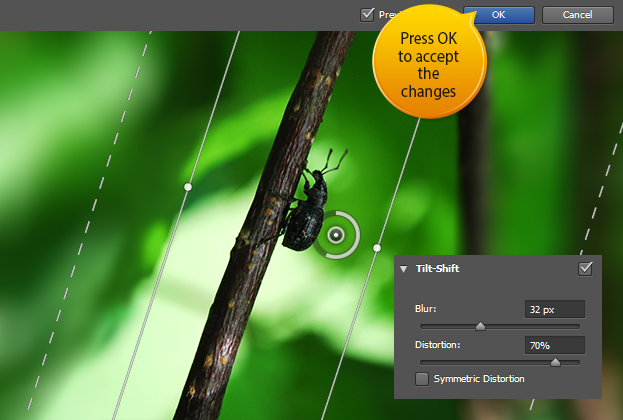
You can also add some distortion from the Tilt-Shift menu that makes the blurred area look more blurry ans smudgy. Press Ok to accept the changes.

And now you know how to successfully use the Tilt-Shift blur in Photoshop CS6.

How to Use the New Iris Blur Inside Photoshop CS6

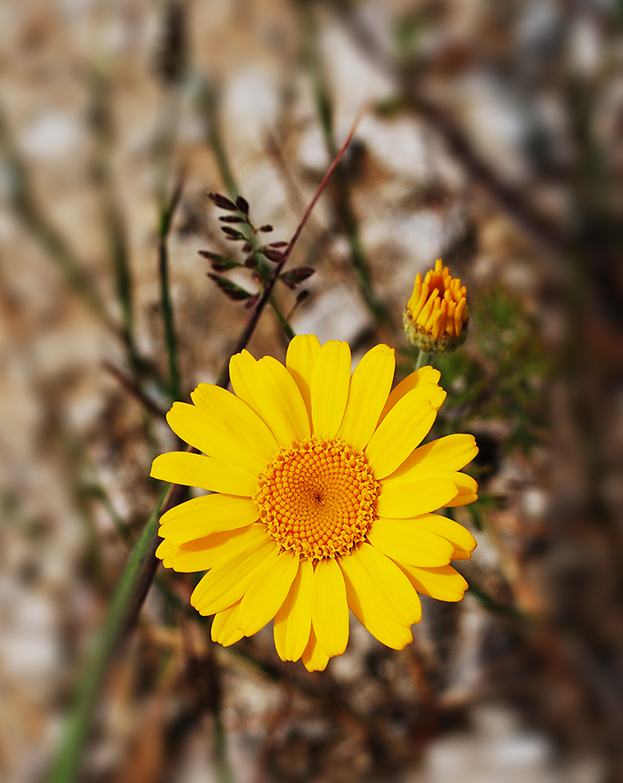
One of three new blurs in Photoshop CS6 is the Iris blur. It creates a blur all around the subject and lets you control where is the subject and how much and how strong the blur is.

Lets see more closely how this Iris Blur works. Open a picture that that you’d wish to blur a bit.

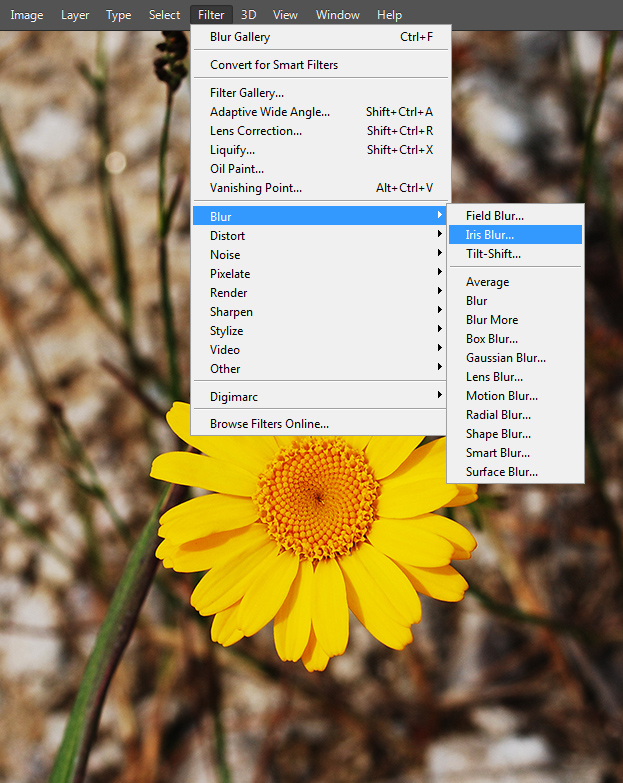
Now locate the new blur at Filter > Blur > Iris Blur.

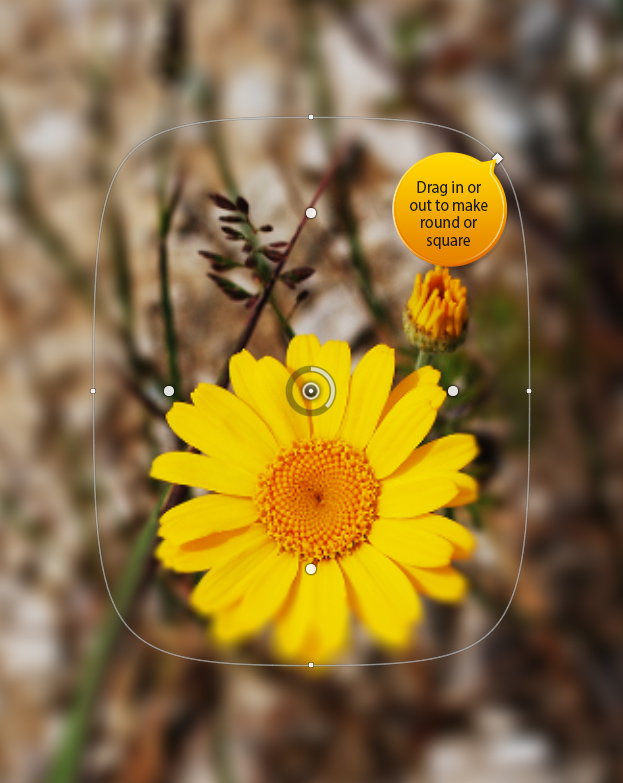
First thing you will see is a circle blur. But you can also make it into a rectangular blur by dragging from the small white box.

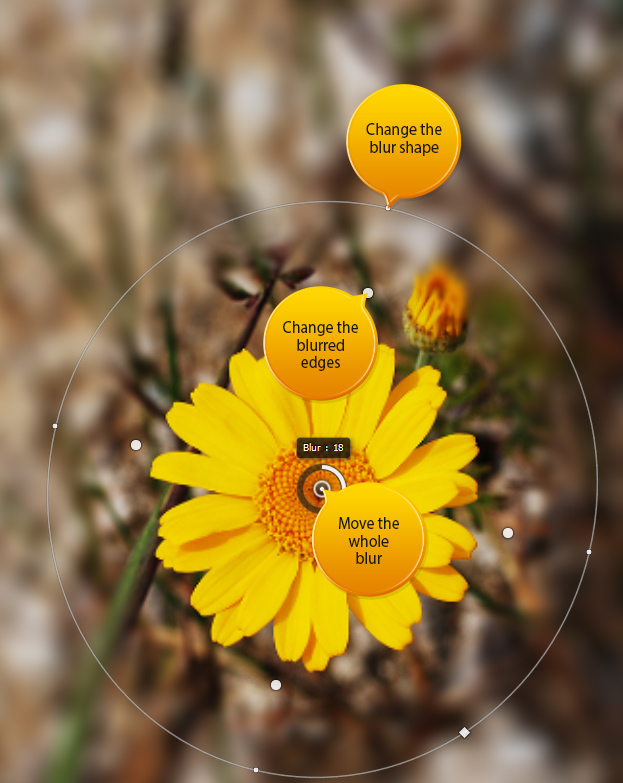
There are many more adjustable points. The small white circles help you to change the size and angle of the blur, the bigger white circles adjust the blurred inner edges and you can move the whole blur around by dragging from the middle circle.

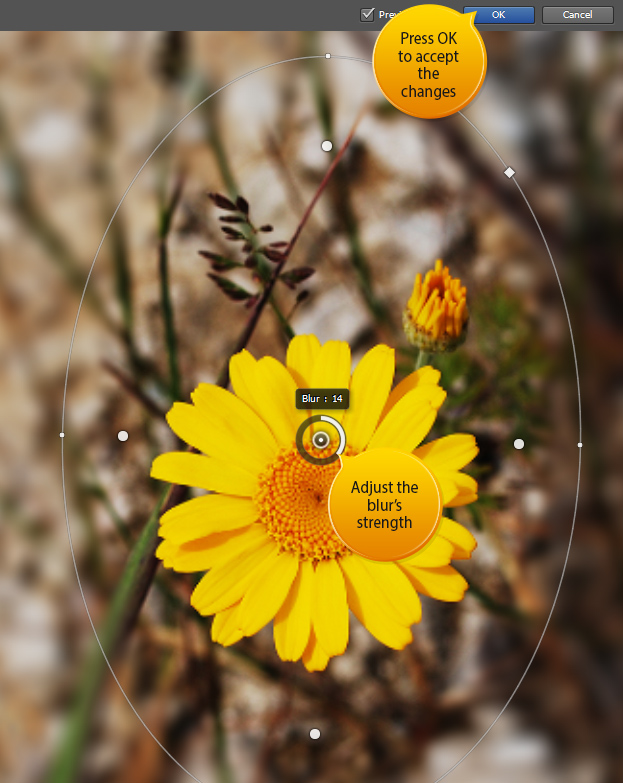
The strength of the blur can be adjusted from the middle circle’s white bar. If you are satisfied with the blur effect you are about to add, just press Ok from the upper bar to accept the changes.

That is all you need to know about the Iris Blur inside Photoshop.