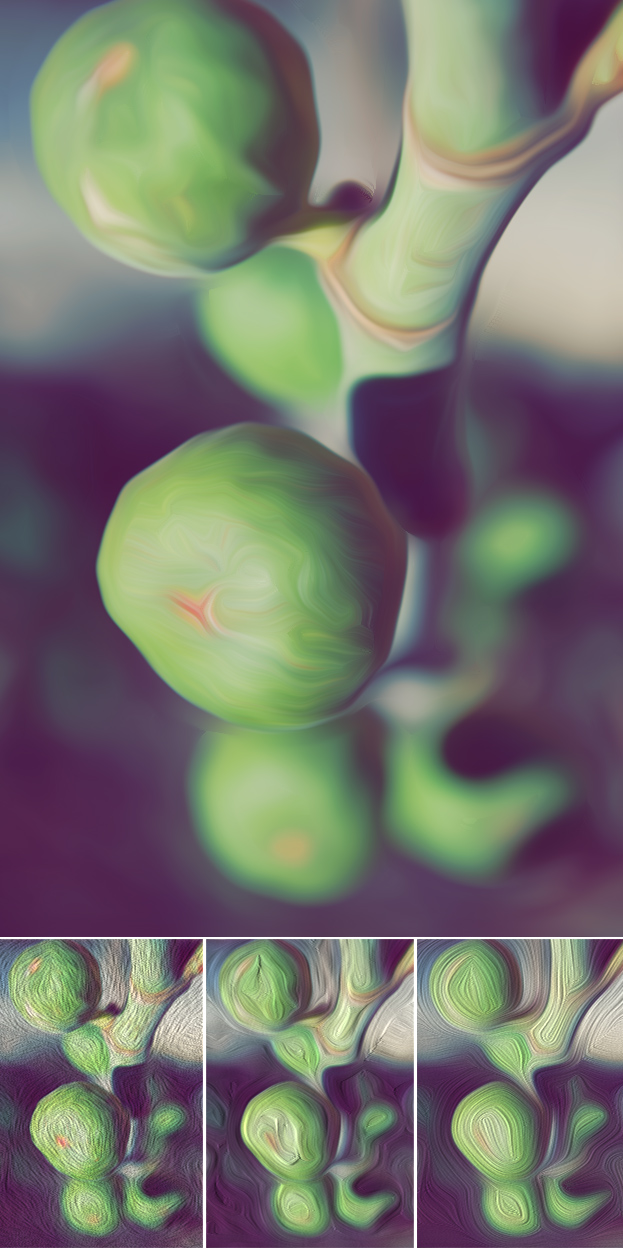
How to Use the New Oil Paint Filter in Photoshop CS6
1. Photoshop CS6 came with many new features, one of them being the oil paint filter that allows you to turn your picture into a nice painting. This tutorial will show you how to use that filter.
Open a picture that you’d like to turn into an oil painting.
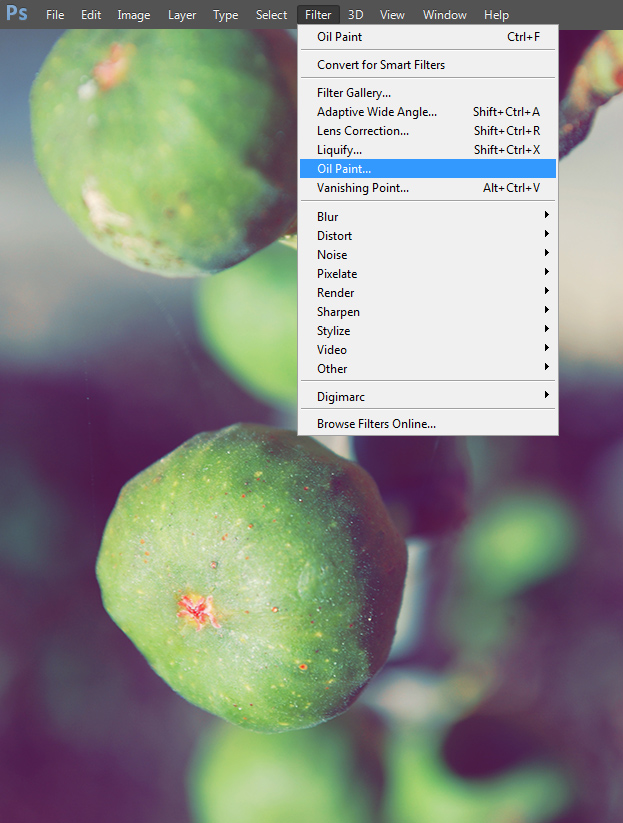
2. You can access the Oil Paint filter from the Filter menu. Just click on it.
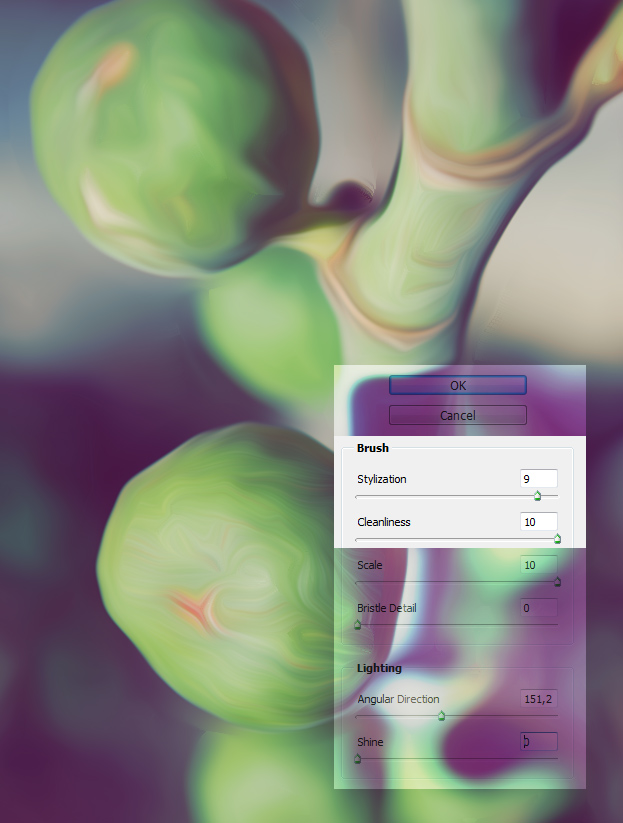
3. A new window will open with many options. The Stylization will determine the length of the oil paint stokes, so the higher the value, the longer the strokes. Cleanliness determines if the strokes are grainy or nice and smooth.
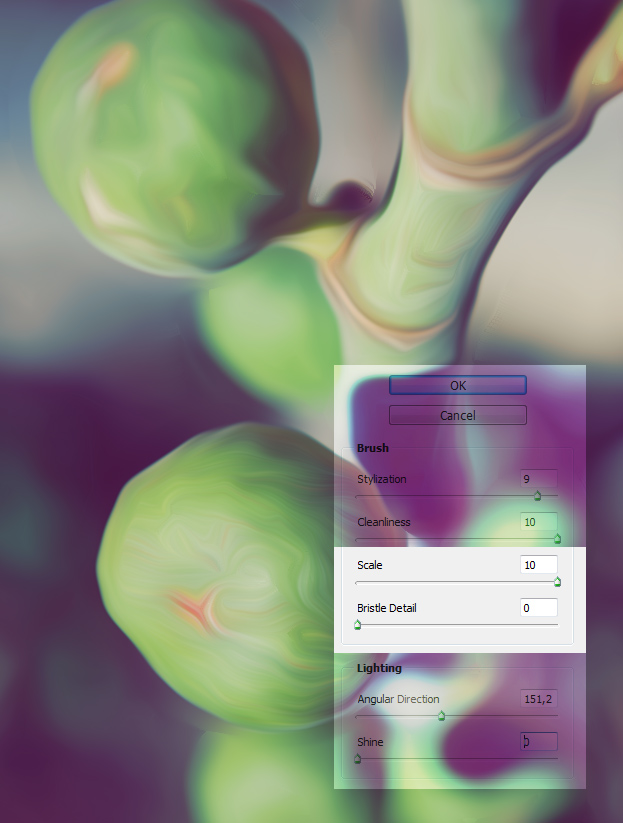
4. The scale will move the brush strokes around. It does not make very much of a difference but is worth adjusting a bit. Bristle Detail will determine the depth of the stokes – the higher the value, the more depth you’ll give.
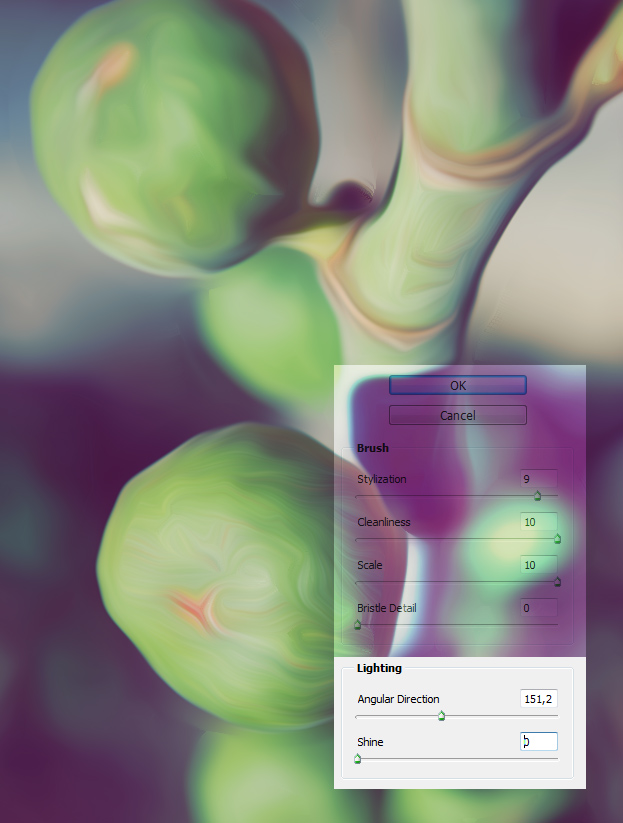
5. The last two values are the Lighting values where the Angular Direction does what the name already say – changes the angle of stokes, and with the Shine you can adjust how shiny (contrasty) the strokes are. For the smoothest result, like on the picture, go for the shine of 0. Press Ok.
6. And you have successfully made an oil painting! Trying out different adjustments give you different results, so be sure to play around.


